openstack-cloud-software

OpenStack Icehouse on Fedora 20 using packstack on home PC

Inspired by the RDO quickstart howto page, I record here the steps I followed to setup OpenStack Icehouse on Fedora 20 on my home server.

Install Fedora 20

f20-changeI have been using Fedora/Redhat for years, but the most recent install I did was Fedora 16, so I am a little out of date with the new processes and procedures. For me, my first step was to go to the Fedora distribution page and down load an ISO to make an install DVD (I selected the Fedora 20 Desktop Edition Live Media).

My hardware was brand new, and I installed Fedora 20 onto a 2T RAID Intel PC box. I let the Fedora installer format my disks to the default settings. I configured a login and timezone and let the install run. Everything worked the first time.

The next couple of steps I follow by sitting infront of the console for my PC. I usually do everything through ssh and/or VNC, but for Openstack setup, I stayed at the console.

Prep for Openstack Icehouse on Fedora 20: Static IP, /etc/hosts, sshd, NetworkManager

Static IP Address

The Fedora install configures the host  to use DHCP to get the initial IP address. The host needs a static IP for Openstack setup to work.  The default  network-scripts for the main host interface are easily edited. For my install, the  interface is named p2p1 (in the old days this would be named eth0).

Configure the ifcfg-p2p1 script to look something like the following:


# vi /etc/sysconfig/network-scripts/ifcfg-p2p1
TYPE="Ethernet"
BOOTPROTO=static
DEFROUTE="yes"
IPV4_FAILURE_FATAL="no"
IPV6INIT="yes"
IPV6_AUTOCONF="yes"
IPV6_DEFROUTE="yes"
IPV6_FAILURE_FATAL="no"
NAME="p2p1"
UUID="42a635ee-281c-44fc-9e16-f4e23111d4fb"
ONBOOT="yes"
HWADDR=40:16:7E:B1:64:CD
IPADDR=192.168.100.154
PREFIX=24
GATEWAY=192.168.100.163
DNS1=8.8.8.8
DNS2=192.168.100.163
IPV6_PEERDNS=yes
IPV6_PEERROUTES=yes

Note: the host’s IP address and its gateway IP address are inside my private IP address range (192.168.100.0/24). I will use these addresses throughout my write-up.

Before I reboot, I want to change a couple of other host configurations.

/etc/hosts and hostname

It turns hostname must be setup right or the packstack script will get stuck.


# hostname kozik4.lan
# vi /etc/hostname
kozik4.lan
# vi /etc/hosts
127.0.0.1 kozik4.lan kozik4 localhost.localdomain localhost
129.168.100.154 kozik4.lan kozik4

Note: .lan is my home network private domain name. I don’t share .lan publically.

SELinux

I turn off SELinux; edit a line in SElinux config file:


# setenforce permissive
# vi /etc/selinux/config
...
SELINUX=permissive
...

sshd for root

Openstack’s install script requires root access for ssh login. To setup ssh:


# vi /etc/ssh/sshd_config
...
PermitRootLogin yes
...
# systemctl  enable sshd.service
# systemctl  start sshd.service

firewalld and NetworkManager

Disable firewalld and NetworkManager as recommended in several of the references.


systemctl disable firewalld

systemctl stop NetworkManager.service
systemctl disable NetworkManager.service
systemctl enable network.service
systemctl start network.service

From here,  reboot. Everything should come back ok. Nothing really changed except switching from dynamic to static IP addressing.  Verify from another PC that ssh [email protected] works. Verify that ping yahoo.com works.

For reference, ifconfig looks like this:


# ifconfig
lo: flags=73<UP,LOOPBACK,RUNNING>  mtu 65536
        inet 127.0.0.1  netmask 255.0.0.0
        inet6 ::1  prefixlen 128  scopeid 0x10
        loop  txqueuelen 0  (Local Loopback)

p2p1: flags=4163<UP,BROADCAST,RUNNING,MULTICAST>  mtu 1500
        inet 192.168.100.154  netmask 255.255.255.0  broadcast 192.168.100.255
        inet6 fe80::4216:7eff:feb1:64cd  prefixlen 64  scopeid 0x20																				
        ether 40:16:7e:b1:64:cd  txqueuelen 1000  (Ethernet)

Install/update Openstack software

RDOlogo

From the host’s root login at /root, run each of the following yum installs, one at a time, verifying that they complete successfully.


yum update -y
yum install -y http://rdo.fedorapeople.org/rdo-release.rpm
yum install -y openstack-packstack 
packstack --allinone --provision-all-in-one-ovs-bridge=n

The last install is the big one.  The packstack script is what puts OpenStack Icehouse on Fedora 20; It will take awhile to run.

It took me a couple of tries to get the last step to work. The hostname must cleanly resolve for the packstack scripts to work. Further, the packstack scripts runs ssh [email protected]. If this is not setup right, packstack will fail. Note: the packstack script prompts you for your root password.

Setup Open vSwitch Bridging

Once done, the packstack scripts sets up an Open vSwitch network as summarized here.


# ifconfig
br-ex: flags=4163<UP,BROADCAST,RUNNING,MULTICAST>  mtu 1500
        inet6 fe80::3442:c4ff:fe5c:874b  prefixlen 64  scopeid 0x20																				
        ether 36:42:c4:5c:87:4b  txqueuelen 0  (Ethernet)

br-int: flags=4163<UP,BROADCAST,RUNNING,MULTICAST>  mtu 1500
        inet6 fe80::a817:aff:fee8:934c  prefixlen 64  scopeid 0x20																				
        ether aa:17:0a:e8:93:4c  txqueuelen 0  (Ethernet)

lo: flags=73<UP,LOOPBACK,RUNNING>  mtu 65536
        inet 127.0.0.1  netmask 255.0.0.0
        inet6 ::1  prefixlen 128  scopeid 0x10
        loop  txqueuelen 0  (Local Loopback)

p2p1: flags=4163<UP,BROADCAST,RUNNING,MULTICAST>  mtu 1500
        inet 192.168.100.154  netmask 255.255.255.0  broadcast 192.168.100.255
        inet6 fe80::4216:7eff:feb1:64cd  prefixlen 64  scopeid 0x20																				
        ether 40:16:7e:b1:64:cd  txqueuelen 1000  (Ethernet)

It turns out that this setup does not connect with the outside world — the default install scripts don’t have a place for me to tell it my home network setup (that I know of). The br-ex needs to connect to the outside world and p2p1 needs to connect to br-ex.

There’s some discussion in RDO community to make it easier for novices like me to connect the packstack install to a home network’s subnet. But for now, there’s a few simple steps to follow to get  the PC’s main interface to connect to the Open vSwitch infrastructure setup by packstack.

For starters, connect the external bridge (named br-ex) to the home network,  by editing the br-ex config file that packstack creates:


# vi /etc/sysconfig/network-scripts/ifcfg-br-ex
DEVICE=br-ex
DEVICETYPE=ovs
TYPE=OVSBridge
BOOTPROTO=static
IPADDR=192.168.100.154
NETMASK=255.255.255.0
GATEWAY=192.168.100.163
DNS1=8.8.8.8
ONBOOT=yes

Note: the br-ex bridge has the IP address and GATEWAY address that I would normally use to access the PC.

And, the host’s interface p2p1 needs to be updated to become Open vSwitch aware, editting the ifcfg-p2p1 file to look like the following:


# vi /etc/sysconfig/network-scripts/ifcfg-p2p1
DEVICE=p2p1
ONBOOT="yes"
HWADDR="40:16:7E:B1:64:CD"
TYPE="OVSPort"
DEVICETYPE="ovs"
OVS_BRIDGE="br-ex"

And one more thing, the openstack dashboard access is limited to localhost only.  Remove this access control, for now.


# vi /etc/openstack-dashboard/local_settings
#ALLOWED_HOSTS = ['192.168.100.154', 'kozik4.lan', 'localhost', ]
ALLOWED_HOSTS = ['*', ]

From here, reboot. When the computer comes back up,  verify that basic network looks good. Here’s what ifconfig looks like:


# ifconfig
br-ex: flags=4163<UP,BROADCAST,RUNNING,MULTICAST>  mtu 1500
        inet 192.168.100.154  netmask 255.255.255.0  broadcast 192.168.100.255
        inet6 fe80::4216:7eff:feb1:64cd  prefixlen 64  scopeid 0x20																				
        ether 40:16:7e:b1:64:cd  txqueuelen 0  (Ethernet)

lo: flags=73<UP,LOOPBACK,RUNNING>  mtu 65536
        inet 127.0.0.1  netmask 255.0.0.0
        inet6 ::1  prefixlen 128  scopeid 0x10
        loop  txqueuelen 0  (Local Loopback)

p2p1: flags=4163<UP,BROADCAST,RUNNING,MULTICAST>  mtu 1500
        inet6 fe80::4216:7eff:feb1:64cd  prefixlen 64  scopeid 0x20																				
        ether 40:16:7e:b1:64:cd  txqueuelen 1000  (Ethernet)
# ovs-vsctl list-ports br-ex
p2p1

Above, verify that  the host’s IP address is tied to br-ex and the interface p2p1 shows as a port on br-ex. These look good. Also verify that ssh [email protected] works; then go to another PC and run the same command. Finally, to make sure that the host can route to the internet, ping yahoo.com. These basic plumbing tests are needed for the rest of openstack to work, and in my case, it didn’t work the first time, and these basic sanity tests helped me troubleshoot.

A stuck point for me:  when I reached this point one time before, I couldn’t ping yahoo.com.  Which was disappointing because everything else worked.  So I ran the following command:

# ip route show
default via 192.168.100.163 dev br-ex  # Verify this line is here!!
169.254.0.0/16 dev p2p1  scope link  metric 1002
169.254.0.0/16 dev br-ex  scope link  metric 1004
169.254.0.0/16 dev br-int  scope link  metric 1005
192.168.100.0/24 dev br-ex  proto kernel  scope link  src 192.168.100.154

Unlike what I list above, the default route didn’t get configured for my host’s network.  I found some helpful notes that suggested manually adding it in (ip route add default via…).  That worked, but what worked better for me was to disable NetworkManager (see steps I list earlier).

As an aside, the ip route show output above works for me, but doesn’t look right.  The lines that begin with 169.254.0.0 shouldn’t be there (I think).  Something is not quite right, but I don’t know if it is worth fixing.  Anyway…

What I get now, is every time I boot, I get a clean network setup, incoming and outgoing.

Ok, once the PC’s network setup is stable after boot,  run the openstack-status script; the script returns a long list of status lines and two key lines indicate a failed status.


# openstack-status
...
neutron-server:                         failed
rabbitmq-server:                        failed
...

For whatever reason (probably some fault in my setup steps), rabbitmq and neutron servers failed to start. I saw this issue addressed in the video referenced below; these services are easily restarted as shown below


systemctl start rabbitmq-server.service
systemctl start neutron-server.service

… everything comes back and the next steps work fine.

Openstack Dashboard

As a last step, go to a web browser and verify that you can login to the openstack dashboard. Once this step works, you should be able to do everything from a web browser or Putty terminal.

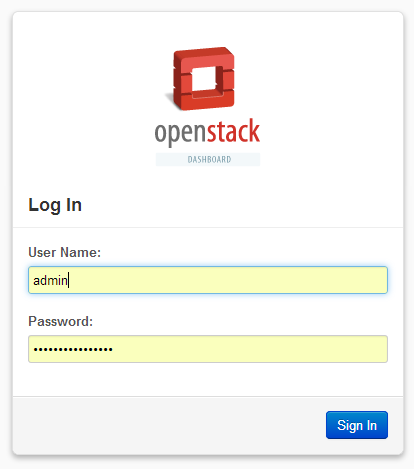
The dashboard is found at http://192.168.100.154/dashboard. The User Name is admin, the password for the dashboard is found in the keystone_admin file.  Once you can login, then installing OpenStack Icehouse on Fedora 20 is complete.

OSHorizonLogin080514

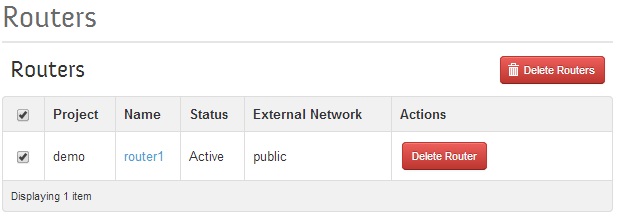
Once we are logged in, we need to navigate to the Admin->Routers page and delete the default router that packstack setup for us, select all the routers (only one) and then click on the “Delete Routers” button below:

AdminRoutersDelete080614

Then we need to go to the Admin->Networks page and delete the networks.  Select all the Networks, then click on the “Delete Networks” button below:

AdminNetworksDelete080614

With the demo network and router setup re-initialized,  we have a clean slate that we can build upon.

End of part 1.  I next need to writeup the steps to configure a OpenStack, including how to load images, create instances, network those instances together, and bridge them to the home network.  In addition, I will writeup how to map a “floating IP address” between an instance and my home network.   All for next time.

References

2014-s7-lg

Audi Connected Car – 2014 S7

My Audi Connected Car is a 2014 S7.  I got it the beginning of June, and I have been learning how to use the Audi Connect service.

TMOSIM2a

SIM Card

In my Audi S7, it has a T-Mobile SIM card, connecting it to the T-Mobile US 3G/UMTS network – the first 6 months of usage is free.  I have turned on the Audi Connect service, linked it with my Google account, linked it with the iPhone App.  I even turned on the Wifi hotspot in my car.  It all works pretty good.  My T-Mobile service is data-only — I see no way to use the TMO voice or text features.

Here are my notes.

Audi Connect iPhone App

AudiConnectiPhoneLogoCrop082614

The Audi S7 has a simple iPhone App.  Two useful features:

  • Online Destinations. I can enter addresses onto an Online Destinations form; these addresses will show-up on my Audi S7′s navigation menu.
  • Car Finder.  I setup the Audi S7 to report it’s GPS coordinates when ever the car shuts off.  The Car Finder feature lets me find where my car is parked.  This is a nice feature, but a little gimmicky for me. You could also find vin for free here.
CarFinderShrink082614

Car Finder App

Google Maps – “Save to Car”

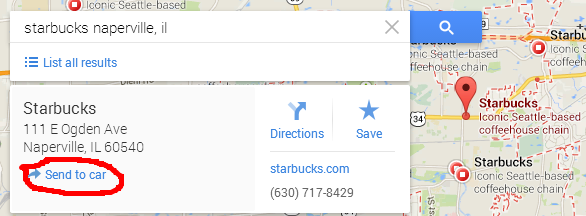
The Audi Connect service also ties into Google Maps.  When I registered my google login with Audi Connect (my.audi.com, Services -> Dest From Google Maps), Google maps added an option to let me save a map address to my car.  Here’s a Google Maps screen shot:

GoogleMapsSaveToCar082614

http://maps.google.com

So if I am going to visit some place new to me, I can look up the address on Google Maps, save it with the “Send to Car” option and have the address show on a menu in the Audi S7 Navigation menu.  Really cool.  I like this feature.

I can erase saved destinations using the mobile app.

myAudi Portal – my.audi.com

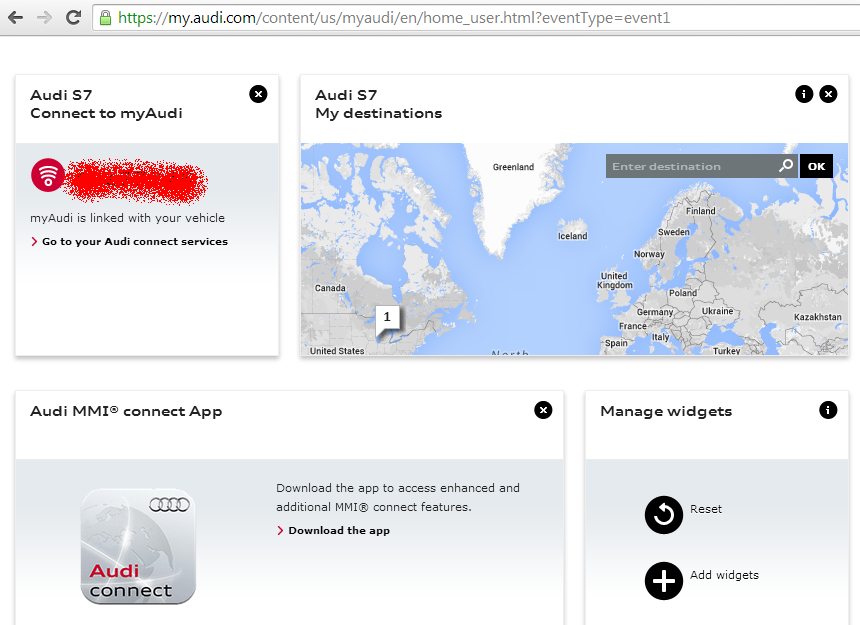
To setup the Audi Connected Car service, I got a login on the myAudi portal, my.audi.com. The portal helped me setup the Destination From Google Maps and Destination Input Services.  The portal required me to enter my VIN number, and it gave me a key to use when setting up the car.

Here’s a snapshot from the portal:

MyAudiCom082714

http://my.audi.com


Audi Connect

audiconnect091714 The MyAudiConnect website links the Audi’s TMO service to the myAudi service.  The key parameters are the 19-20 characters printed on the SIM card (technically known as an ICCID — see the SIM wiki) and the car’s 17 character VIN number.     The Audi Connect Car uses T-Mobile.  The My Audi Connect portal’s drop-down menu also lets you choose AT&T.

As near as I can tell, I will never get a bill directly from T-Mobile.  It appears to come from Audi — but I am sure T-Mobile is getting paid.

https://myaudiconnect.com

https://myaudiconnect.com

The screenshot above indicates that my Account is active, but my Audi Connect and Wireless Networks are inactive — that’s correct, the car is parked, off, in my driveway. Also, it is hard to read, but the two airbrushed-out fields above are the car’s VIN number and the T-Mobile SIM card number.   Sorry if I got carried away with the red stuff.

Dashboard View

The view from the dashboard in the car is pretty intuitive.  When in the Navigation mode, the following screen displays when you selection “Destinations”

AudiConnectedCarDashboarda090514

Navigation->Destination->Online destinations

The display shows an “Online destination” option and from there, the destinations that you set using the Google Maps “Send to Car” option are found.

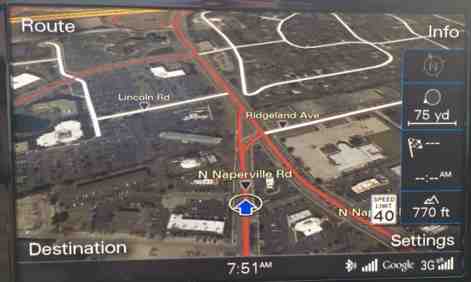
A nice feature of the Audi Connected Car is the navigation  view superimposes satellite maps from Google Maps, as seen below:

SatelliteMap

Navigation Map w/Satellite View

Some additional Google Maps features of note:

  • Google Search.  The traditional in-car Navigation systems have a very good database of point-of-interests and street address.  The Audi Connected Car lets you use a direct Google search to find nearby or destination-city destinations.
  • The Google Maps display settings let you put Places, Businesses, Panoramio pictures, or even pointers to WIKipedia

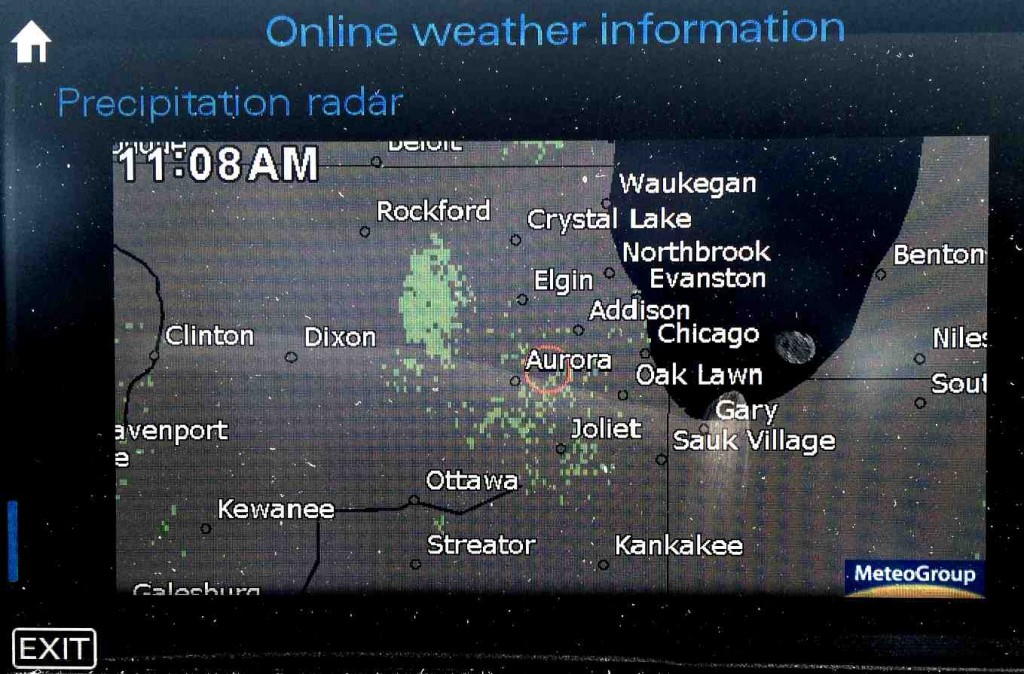
Below are screen shots directly from Audi Connect information services.  First there’s a menu of simple services (not linked with Google), and below that is a screen capture of a radar weather map.  The content is formatted special for Audi and is not real websurfing.

AudiConnectInfoMenu

Menu->Info->Audi Connect


OnlineWeatherInformation

Menu->Info->Audi Connect->Weather Info

SIM Card Slot

The car’s dashboard has a slot, hidden by a folding door, where the SIM card slot and two SD card slots are found.  Note:  only the SIM card is plugged in for the picture below.

SIM Card Slot

SIM Card Slot

In Car WIFI

The car lets you setup a WIFI hotspot that routes through the TMO UMTS/3G data service.  I tried it; it worked ok, but it’s not as fast as our 4G/LTE data service and I am not really sure why I’d ever want to use this — maybe for a guest?

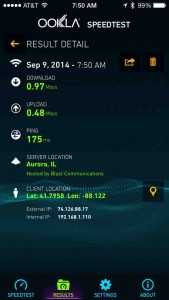
Anyway, I ran a speedtest on the WIFI and for my neighborhood, the service is 1Meg down / 0.5 up.  Here’s a screenshot from my mobile:

SpeedTest


References

City-Hall

Walk Baltimore Inner Harbor and Downtown Area

My First Day

After my first full day of meetings in Baltimore Inner Harbor, I went for a pre-dinner walk.  My hotel is on the Baltimore Inner Harbor front.  I started there, walked North along Gay Street upto City Hall. Then I turned left and looped back South along Commerce Street back to the Inner Harbor / Pratt Street.
HarborplaceAlong the way, I saw: the Holocaust Memorial, United State Appraisers’ Stores, United States Custom House, Charles L. Benton Jr. Building, the Baltimore Street Red Light district, War Memorial Building and Plaza, Zion Lutheran Church, Memorial  to The Negro Heroes of the United States, Stratford University, World Trade Center, Harbor Maritime Museum, and Pratt Street Power Plant.
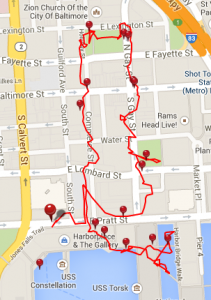
The weather was overcast, with a steady drizzle.
BaltimoreInnerHarbor042814

Link to Everytrail Trip

My Last Evening

After dinner on my last day of meeting in Baltimore, I went for an evening walk through the downtown area.
I started at my hotel on the Inner Harbor (Pratt Street) and walked North and West on Lombard St.  I walked up to the iconic Bromo-Seltzer Tower, then I headed North and walked East on Baltimore Street, turned left on to Calvert Street to the nicely lit-up Battle Monument.  From there, I zig-zagged over to South Street and walked over to the Inner Harbor water front where I walked over to Pier 5, then headed back to my hotel.
Bromo TowerAlong the way, I saw:  William Donald Schaefer  Federal Building and it’s colorful lawn sculpture, The Emerson Bromo-Seltzer Tower, Bank of America Building, Battle Monument, City Hall, Furness House, National Aquarium, Pratt Street Power Plant, Institute of Marine and Environmental Technology (IMET), and the USCGC Taney Coast Guard Cutter.
This was my first visit to Baltimore Inner Harbor, and it rained the whole time, all three days.  I wasn’t going to let some rain stop me from exploring the historic downtown area, but maybe next time I will come when it isn’t monsoon season and explore a little further.  And, maybe even see an Orioles baseball game at the nearby Camden Yard ballpark.
BaltimoreInnerHarbor042914

TIPS

Overall, the Baltimore Inner Harbor area is very nice and very new.  When you walk further into the historic downtown area, you see buildings that are considerably older and of more historic significance.  I nice place to wander through.
The Baltimore Inner Harbor area is a good area for business meetings.  Lots of shopping and dinner spots nearby.  I was able to go back and forth to the airport over a very convenient Light Rail line (cheap, too!)
nodejslogo-light

REST web service using Node, was originally written in PHP

Background on my REST web service using Node.js: One of my REST web service applications, originally written in PHP several years ago, needed to be cleaned up. I wanted to re-factored it to make it easier for me to maintain.   I had picked a PHP framework, and I was going to re-code.

For my own education, I decided to use this project as a trigger to learn Node.js.

I had been following the progress of the node community and some of the organizations at work had started using node, so I decided to give it a try. I had been using JavaScript for quite awhile doing front end programming in my browser applications and felt that it shouldn’t be too hard for me to learn.

The notes that follow capture some of my learnings and record some of the steps I followed to design and setup my new web service.

Install Node.js on my Fedora Server

I am a system admin of my own Fedora server, and I was looking to do a full install of nodejs. If you have a new Fedora sever (Fedora 18+), you just use “yum install nodejs” — but I have an older Fedora server so I had to dig around;  I found several useful Howto’s. What worked best for me was the following steps:

From root login:


$ cd /usr/local
$ wget http://nodejs.org/dist/v0.10.25/node-v0.10.25.tar.gz
$ tar zxvf node-v0.10.25.tar.gz
$ cd node-v0.10.25
$ ./configure
$ make
$ make install

Source: Ask Fedora Project

I then put node into default login profile:

$ cd /etc/profile.d
$ vi node.sh
#insert following lines
export PATH=/usr/local/bin:$PATH
export NODE_PATH=/usr/local/lib/node_modules
ZZ

From the root home directory and from my user log in id, I verified that node worked:

$ node -v
v0.10.25

The in my user account, I wrote a hello world style test application:

$ cd $HOME
$ mkdir helloworld
$ cd helloworld
$ vi app.js
// Insert the following files
// I forget which howto website I borrowed this from
var http = require('http');
var server = http.createServer(function(req, res) {
  console.log("web page accessed");
  res.writeHead(200);
  res.end('Hello Http');
});
server.listen(8000);
ZZ
$ node app.js

Note: the app.js is listening on port 8000. To make this work on my server, I needed to go into iptables and open port 8000. I am not going to show how to do that here, but it is easy to do and easy to overlook. It is worth the trouble to get this little app working because you’ll need port 8000 working for the next step.

Once port 8000 is open and the app.js script running, do the following command in a different terminal  window.

From user login:

$ curl -i http://localhost:8000

Output:

HTTP/1.1 200 OK
Date: Thu, 13 Feb 2014 16:27:00 GMT
Connection: keep-alive
Transfer-Encoding: chunked

Hello Http 

This turned out to be harder than I thought. The nodejs website offers Linux Binaries; I tried them and they didn’t work. I assume I did something wrong. Instead, I did the install from source setup.  On my machine, it took about 10 minutes to compile and build. (The make step was longer than I thought).

Restify Module

The node.js community has a large library of packaged modules. I picked the Restify module to build my package upon.  Since I am new to node, I don’t really know what the best choice would be, I just wanted to leverage something that had some good howto articles.

To setup restify, I ran the following steps from my root login:

$ npm install restify -g

Then from my development login, I wrote a barebones test application:

$ cd $HOME
$ mkdir restify
$ cd restify
$ vi app.js
// insert the following lines
// borrowed from stack overflow article:
// http://stackoverflow.com/questions/17589178/why-should-i-use-restify
var restify = require('restify');
var server = restify.createServer();
function respond(req, res, next) {
    res.send('hello ' + req.params.name);
}
server.get('/hello/:name', respond);
server.listen(8000, function() {
    console.log('Listening on port 8000');
});
ZZ
$ node app.js

Like the previous hello world test, this one verifies that basic restify works. I ran “node app.js” in one terminal window and in the other, I ran the following:


$ curl -i http://localhost:8000/hello/jack

Output:

HTTP/1.1 200 OK
Content-Type: application/json
Content-Length: 12
Date: Thu, 13 Feb 2014 17:03:19 GMT
Connection: keep-alive

hello jack 

I make this all look so easy, but along the way I had several gotcha type problems. I originally didn’t have the environment variables setup right. And, my initial installation of restify, I forgot to use the -g option. And for my initial setup, I did a couple of things in my root login that should have been done in my user login, etc. It is worth it to get the basic hello world done before you start.

Reference:  Creating a basic node.js api with restify and save by Dom Udall

My REST Design

RESTbooksMy web application edits and reports on some resources stored on my server. I want to grant access to these resource through a REST-ish API. The two key resources are charts and jefiles — it turns out that these are actually text files stored on my server. There is one chart file per year, so in my REST URI  I use the notation: chart/YY. The jefile files are monthly, with 12 months per year, so I picked the notation jefile/YY/MM.  In my REST URIs, MM=00-12 and YY is any two digits representing a year (eg YY==12 implies 2012, YY==98 implies 1998).

So, my design is for the following “GET” operations return data from the server to my web application:

# returns contents of chart file for the year YY, 
# where YY is 13 for 2013
http://localhost:8000/chart/YY 

# returns contents of jefile for the year YY, Month MM
# - where YY is 13 for 2013
# - where MM is 01-12, for a month
http://localhost:8000/jefile/YY/MM  

# returns concatenation of all jefiles for the year YY
# - where YY is 13 for 2013 (used for year to date reports)
http://localhost:8000/jefile/YY

Also, for debugging purposes, I want both plain text and json formatted data returned. I picked the above syntax to represent plain text response. Here’s the syntax for json responses:

http://localhost:8000/chart.json/YY
http://localhost:8000/jefile.json/YY/MM
http://localhost:8000/jefile.json/YY

I have experimented with using MIME types or other header mechanisms to control plain text vs json. I like this method because it lets me debug in any a normal browser; no special REST browser plugins needed to be installed. This approach is also valuable to me because it maintains continuity with my existing, several year old, PHP design approach.

So with this design, here’s the basic restify application.

From the file app.js:

var restify = require('restify');

var server = restify.createServer();
server
  // Allow the use of POST
  .use(restify.fullResponse())
  // Maps req.body to req.params so there is no switching between them
  .use(restify.bodyParser());

server.get('/chart/:YY', getChart);
server.get('/chart.json/:YY', getChart);

server.get('/jefile/:YY', getJefileForYY);
server.get('/jefile.json/:YY', getJefileForYY);

server.get('/jefile/:YY/:MM', getJefile);
server.get('/jefile.json/:YY/:MM', getJefile);
server.put('/jefile/:YY/:MM', putJefile);

server.listen(8000, function() {
    console.log('Listening on port 8000');
});

The server.get() callback functions (eg getJefile() ) all follow a common pattern:

function getJeFile(req, res, next) {
    console.log(params.req.YY);
    console.log(req.route.name);
    ...; 
    res.send(...);
    next();
}

The restify framework’s server.get() function takes the incoming REST request, parses the URI and matches it to the first parameter of the server.get() function,  and runs the callback  function with the request neatly parsed into the object req. Since in REST APIs, the GET method nominally has an empty message body, the only real input are the parameters parsed out of the URL. In my code above :YY and :MM ids are the names of the URI parameters.

These parameters are parsed by restify and stored  in the object params.req. For all of my server functions, I always have params.req.YY as in input. Restify API document covers this, but again, this design pattern is found throughout nodejs code as a way for a chain of functions to all share the same input and output objects.

The callback functions above (eg getJeFile()) generates the content that gets stored into the response object, the 2nd callback parameter res. When the callback function is complete, it calls next(), the 3rd parameter.

So here’s what my 3 server.get() callback functions look like.

From app.js:


getChart = function getChart(req, res, next) {
    console.log(req.route.name);
    var year = req.params.YY;
    // validate year
    // get contents of chart file
    // if I find any errors:  return next( Error object )
    res.send(chartFile);
    return next();
}

getJefile = function getJefile(req, res, next) {
    console.log(req.route.name);
    var year = req.params.YY;
    var month = req.params.MM;
    // validate year, month
    // read contents of jefile file
    // if I find any errors:  return next( Error object )
    res.send(jefileFile);
    return next();
}

getJefileForYY = function getJefileForYY(req, res, next) {
    console.log(req.route.name);
    var year = req.params.YY;
    // validate year
    // get contents of all of the jefile files, concatenate
    // If I find any errors:  return next( Error object )
    res.send(jefileFileForYY);
    return next();
}

Note:  the above code is simplified to better help explain what I am doing.

For the case where my web application wants to write content to the server, I use the REST PUT method. The PUT method writes or overwrites the full contents of a resource. Since I am working with whole files on the web server, PUT is appropriate. POST would be OK, if I was adding blocks of data to an existing file; but I am not.

So to make a PUT work in the restify framework, my server.put() callback function needs to parse and validate the message body, convert it from JSON to a native format then save the contents to a file on the server. Restify makes this pretty easy. Here’s the basics:

From app.js:


putJefile = function putJefile(req, res, next) {
    console.log(req.params);
    console.log(req.route.name);
    var year = req.params.YY;
    var month = req.params.MM;
    // validate year
    // validate requerst body, named jefilejson, is valid
    jefileFile = JSON.pars(req.params.jefilejson)
    // write contents of jefileFile to server, directory YY, file-MM
    res.send(200)
    return next();
}

Note: the message body holds a json object; in my case, the web application names the json object jefilejson. So to access the contents of the message body, you access req.params.jefilejson.

Validating the MM and YY ids

The server.get() routing function’s syntax makes it easy to match roughly correctly formatted URIs, but for me, it didn’t have enough checking power to verify that the YY and MM ids were correct. Server.get() just matches any character between the slashes; it doesn’t check that YY is 2 numeric digits or that MM is 01-12 only with the leading zero required. I had to add my own validation logic in each of my callback functions.

It turns out the code for verifying YY and MM ids was several lines of coded repeated multiple times. Node.js and restify design patterns give you the option of inserting additional callback functions into the server.get() function call. I added validation functions as follows:

From app.js:


server.get('/chart/:YY', validateYY, getChart);
server.get('/chart.json/:YY', validateYY, getChart);

server.get('/jefile/:YY', validateYY, getJefileForYY);
server.get('/jefile.json/:YY', validateYY, getJefileForYY);

server.get('/jefile/:YY/:MM', validateYY, validateMM, getJefile);
server.get('/jefile.json/:YY/:MM', validateYY, validateMM, getJefile);
server.put('/jefile/:YY/:MM', validateYY, validateMM, putJefile);

Now, I liked this because it let me re-factor a bunch of common code out of each of my callback functions. I have seen other node.js code snippets that take advantage of this coding pattern.

Validation Functions and Error Handling.

Within a nodejs or restify program, there’s a common way of handling errors. Since everything is asynchronous and chained together with next() functions, there needs to be a way to break the chain on error conditions. The key technique is to call the next() function with an Error object as a parameter. Let me show how I coded the validateYY() function.

From app.js:


/*
** Validate YY id.
** -- syntax:  2 digits, 00-99
** -- directory nfroot+YY must exist
*/
function validateYY(req, res, next) {
    var ret = 500;
    var year = req.params.YY;
    console.log('validateYY:'+req.route.name);
    var isValidYY = year.match(/^\d\d$/);
    if (!isValidYY) {
        ret =  new Error("The field YY-'"+year+"' is not valid.  YY is a two digit year where YY is 00-99");
        ret.statusCode = 400;
        return next(ret);
    }
    /* Verify that YY exists */
    if (!fs.existsSync(nfroot+year)) {
        ret = new Error("The field YY-'"+year+"' is not valid. The diretory-'"+nfroot+year+"' doesn't exist on server.");
        ret.statusCode = 404;
        return next(ret);
    }
    /* Verify that YY is a directory */
    if (!fs.lstatSync(nfroot+year).isDirectory()) {
        ret = new Error("Server side problem:  The path -'"+nfroot+year+"' is a file, but must be a directory.");
        ret.statusCode = 500;
        return next(ret);
    }
    return next();
}

The key is the Error object. When I first saw code snippets using the Error object, I didn’t really know what’s going on. I Googled it and found there’s a rich design pattern built into node.js around how errors are handled. If you just jump into node.js like me, there’s lots of things you need to learn. Restify just leverages Error, assuming coders already know how to work node.js.

Notice in the code above, I tried really hard to follow best practices for mapping http error codes into my REST API definitions. For the case of  someone trying to access a resource like a particular jefile file within a year (eg ..jefile/YY/MM): If the syntax was wrong, I returned a Bad Format (400) error; if the format of the REST URI was right but the file requested file didn’t exist I returned a Not Found (404) error. Also, I even verified that YY in the path was really a directory on the server; if not, that’s shouldn’t ever happen — I returned a Server Error (500).

The way the function chaining works: if next() is passed an Error object, the chaining stops and a json formated response is generated with Error information. This powerful construct is built into node.js, but if you didn’t know it, you might start inventing it yourself, especially if you come from a PHP background, like me.

Splitting Node applications into multiple files – Module Loading with Require

When I first started my node project, I put everything into one big app.js file. This got too big and clumsy for me. I am used to working on projects where coding is split across multiple source files. The node documentation defines a method for split source code across multiple files…  similar to how multiple modules are handled in web browser applications.

I decided to dedicate a source file to each of my main REST resources. For this writeup, those would be chart.js and jefile.js. I still have a main app.js. The way to link them together is to use the require() functions at the top of each file:

Contents of app.js:


var restify = require('restify');
var chart = require('./chart');
var jefile = require('./jefile');
...
server.get('/chart/:YY', validateYY, chart.getChart);
server.get('/chart.json/:YY', validateYY, chart.getChart);
server.get('/jefile/:YY/:MM',validateYY,validateMM, jefile.getJefile);
server.get('/jefile.json/:YY/:MM',validateYY,validateMM,
             jefile.getJefile);
server.put('/jefile/:YY/:MM',validateYY,validateMM,jefile.putJefile);

Contents of jefile.js:


exports.putJefile = function putJefile(req, res, next) { ... }
exports.getJefile = function getJefile(req, res, next) { ... }

Contents of chart.js:


exports.getChart = function getChart(req, res, next) { ... }

Note a few things: the require() function for restify does not need a path. I installed the restify NPM globally (-g option).  The require() function is only needed in the main file, app.js. The restify routing functions (eg server.get()) references callback functions from the other source files, by prefixing with chart or jefile. And, the source code for those callbacks are written as exports (eg. exports.getJefile = …).

Note how I managed, syntactically, my REST GET API methods for returning plain or JSON responses.  ../chart/YY returns the contents of the chart file for year YY; ../chart.json/YY returns the same file, but in JSON format.  Visually, I would rather see the contents of the chart file in native format, but for web page development, I want all responses in JSON format.  The server.get() callback for both of these cases is getChart().  The way the getChart() function knows to return json or native format is by looking at the req.route.name parameter; that tells me how the getChart() was called.

The way source files are modularized is a pattern is written about in the nodejs documentation, but it turns out there are many more advanced ways of managing modules. This one worked great for me. It also made it easier for me to debug and test each resource without wrecking, accidentally, the others.

Reference: Node API Docs: Modules 

Run Node and Apache both on Port 80

As I get my REST web service using Node working, I need to integrate it into the web service infrastructure already installed on my server.  Port 80 today runs Apache serving  blogs, weather stations,  and a couple of web applications — all intertwined with Apache and I cannot just start over.

So I found a way to get Apache to work with node; I keep node on port 8000 and Apache on port 80 and configure an Apache “ProxyPass” for URLs to the node-based REST service.

In /etc/httpd/conf/httpd:

<VirtualHost 64.53.181.XXX 192.168.100.XXX >
    ServerName mydomain.com
    ...
    ProxyPass /node http://localhost:8000/
    ...
</VirtualHost >

Any URI with mydomain.com/node in it gets redirected to my node service. This is good, but part of the reason for moving to node is that it is supposed to give much improved performance — not that Apache is slow, but because it has years of historic features built into it that take longer to execute.

Well someday, I’ll run only node. But for now, for me, node must coexist and this method works for me.

Conclusions

Working with Javascript on the server side was nice.  For me, the debugging skills that I use for web page development carried over nicely to node development.  Nodejs’s asynchronous design pattern was new to me, but once I caught on, it wasn’t bad.  The way nodejs standardizes error handling is much better than the adhoc approaches that I have been using with PHP.

I found that I missed some of the PHP built in functions.  For example, to access files on the server, nodejs has a very robust File System module.  It behaves differently from PHP, but I was able to figure it out — they are all based on the same underlying C libraries.  I resisted the temptation to use one of the frameworks that help bridge PHP developers into nodejs; they aren’t bad, but they worked against my objective to learn.

Some next steps:  I would like to do some performance comparisons.  Superficially, my REST API re-written in node is faster than the existing PHP implementation.  I’d like to quantify.  Also, I have written server side code, that I ought to be able to use inside the web client applications; that would be a nice thing to clean up.  Also, I’d like to get my node application to do logging at least equal to the logging I get from Apache — restify has some nice built in features for that.

There’s a big library of NPM modules out there. I’d like to learn more about them. This time around, all I really needed was restify. Maybe next time, I’ll try to use more of the features inside of it, or branch out and learn express. Anyway, thanks to the greater nodejs community for helping me get started.

nodejs-1024x768