
Inspired by the RDO quickstart howto page, I record here the steps I followed to setup OpenStack Icehouse on Fedora 20 on my home server.
Install Fedora 20
 I have been using Fedora/Redhat for years, but the most recent install I did was Fedora 16, so I am a little out of date with the new processes and procedures. For me, my first step was to go to the Fedora distribution page and down load an ISO to make an install DVD (I selected the Fedora 20 Desktop Edition Live Media).
My hardware was brand new, and I installed Fedora 20 onto a 2T RAID Intel PC box. I let the Fedora installer format my disks to the default settings. I configured a login and timezone and let the install run. Everything worked the first time.
The next couple of steps I follow by sitting infront of the console for my PC. I usually do everything through ssh and/or VNC, but for Openstack setup, I stayed at the console.
Prep for Openstack Icehouse on Fedora 20: Static IP, /etc/hosts, sshd, NetworkManager
Static IP Address
The Fedora install configures the host to use DHCP to get the initial IP address. The host needs a static IP for Openstack setup to work. The default network-scripts for the main host interface are easily edited. For my install, the interface is named p2p1 (in the old days this would be named eth0).
Configure the ifcfg-p2p1 script to look something like the following:
# vi /etc/sysconfig/network-scripts/ifcfg-p2p1
TYPE="Ethernet"
BOOTPROTO=static
DEFROUTE="yes"
IPV4_FAILURE_FATAL="no"
IPV6INIT="yes"
IPV6_AUTOCONF="yes"
IPV6_DEFROUTE="yes"
IPV6_FAILURE_FATAL="no"
NAME="p2p1"
UUID="42a635ee-281c-44fc-9e16-f4e23111d4fb"
ONBOOT="yes"
HWADDR=40:16:7E:B1:64:CD
IPADDR=192.168.100.154
PREFIX=24
GATEWAY=192.168.100.163
DNS1=8.8.8.8
DNS2=192.168.100.163
IPV6_PEERDNS=yes
IPV6_PEERROUTES=yes
Note: the host’s IP address and its gateway IP address are inside my private IP address range (192.168.100.0/24). I will use these addresses throughout my write-up.
Before I reboot, I want to change a couple of other host configurations.
/etc/hosts and hostname
It turns hostname must be setup right or the packstack script will get stuck.
# hostname kozik4.lan
# vi /etc/hostname
kozik4.lan
# vi /etc/hosts
127.0.0.1 kozik4.lan kozik4 localhost.localdomain localhost
129.168.100.154 kozik4.lan kozik4
Note: .lan is my home network private domain name. I don’t share .lan publically.
SELinux
I turn off SELinux; edit a line in SElinux config file:
# setenforce permissive
# vi /etc/selinux/config
...
SELINUX=permissive
...
sshd for root
Openstack’s install script requires root access for ssh login. To setup ssh:
# vi /etc/ssh/sshd_config
...
PermitRootLogin yes
...
# systemctl  enable sshd.service
# systemctl  start sshd.service
firewalld and NetworkManager
Disable firewalld and NetworkManager as recommended in several of the references.
systemctl disable firewalld

systemctl stop NetworkManager.service
systemctl disable NetworkManager.service
systemctl enable network.service
systemctl start network.service
From here, reboot. Everything should come back ok. Nothing really changed except switching from dynamic to static IP addressing. Verify from another PC that ssh [email protected] works. Verify that ping yahoo.com works.
For reference, ifconfig looks like this:
# ifconfig
lo: flags=73<UP,LOOPBACK,RUNNING>  mtu 65536
        inet 127.0.0.1  netmask 255.0.0.0
        inet6 ::1  prefixlen 128  scopeid 0x10
        loop  txqueuelen 0  (Local Loopback)

p2p1: flags=4163<UP,BROADCAST,RUNNING,MULTICAST>  mtu 1500
        inet 192.168.100.154  netmask 255.255.255.0  broadcast 192.168.100.255
        inet6 fe80::4216:7eff:feb1:64cd  prefixlen 64  scopeid 0x20
        ether 40:16:7e:b1:64:cd  txqueuelen 1000  (Ethernet)
Install/update Openstack software

From the host’s root login at /root, run each of the following yum installs, one at a time, verifying that they complete successfully.
yum update -y
yum install -y http://rdo.fedorapeople.org/rdo-release.rpm
yum install -y openstack-packstack
packstack --allinone --provision-all-in-one-ovs-bridge=n
The last install is the big one. The packstack script is what puts OpenStack Icehouse on Fedora 20; It will take awhile to run.
It took me a couple of tries to get the last step to work. The hostname must cleanly resolve for the packstack scripts to work. Further, the packstack scripts runs ssh [email protected]. If this is not setup right, packstack will fail. Note: the packstack script prompts you for your root password.
Setup Open vSwitch Bridging
Once done, the packstack scripts sets up an Open vSwitch network as summarized here.
# ifconfig
br-ex: flags=4163<UP,BROADCAST,RUNNING,MULTICAST>  mtu 1500
        inet6 fe80::3442:c4ff:fe5c:874b  prefixlen 64  scopeid 0x20
        ether 36:42:c4:5c:87:4b  txqueuelen 0  (Ethernet)

br-int: flags=4163<UP,BROADCAST,RUNNING,MULTICAST>  mtu 1500
        inet6 fe80::a817:aff:fee8:934c  prefixlen 64  scopeid 0x20
        ether aa:17:0a:e8:93:4c  txqueuelen 0  (Ethernet)

lo: flags=73<UP,LOOPBACK,RUNNING>  mtu 65536
        inet 127.0.0.1  netmask 255.0.0.0
        inet6 ::1  prefixlen 128  scopeid 0x10
        loop  txqueuelen 0  (Local Loopback)

p2p1: flags=4163<UP,BROADCAST,RUNNING,MULTICAST>  mtu 1500
        inet 192.168.100.154  netmask 255.255.255.0  broadcast 192.168.100.255
        inet6 fe80::4216:7eff:feb1:64cd  prefixlen 64  scopeid 0x20
        ether 40:16:7e:b1:64:cd  txqueuelen 1000  (Ethernet)
It turns out that this setup does not connect with the outside world — the default install scripts don’t have a place for me to tell it my home network setup (that I know of). The br-ex needs to connect to the outside world and p2p1 needs to connect to br-ex.
There’s some discussion in RDO community to make it easier for novices like me to connect the packstack install to a home network’s subnet. But for now, there’s a few simple steps to follow to get the PC’s main interface to connect to the Open vSwitch infrastructure setup by packstack.
For starters, connect the external bridge (named br-ex) to the home network, by editing the br-ex config file that packstack creates:
# vi /etc/sysconfig/network-scripts/ifcfg-br-ex
DEVICE=br-ex
DEVICETYPE=ovs
TYPE=OVSBridge
BOOTPROTO=static
IPADDR=192.168.100.154
NETMASK=255.255.255.0
GATEWAY=192.168.100.163
DNS1=8.8.8.8
ONBOOT=yes
Note: the br-ex bridge has the IP address and GATEWAY address that I would normally use to access the PC.
And, the host’s interface p2p1 needs to be updated to become Open vSwitch aware, editting the ifcfg-p2p1 file to look like the following:
# vi /etc/sysconfig/network-scripts/ifcfg-p2p1
DEVICE=p2p1
ONBOOT="yes"
HWADDR="40:16:7E:B1:64:CD"
TYPE="OVSPort"
DEVICETYPE="ovs"
OVS_BRIDGE="br-ex"
And one more thing, the openstack dashboard access is limited to localhost only. Remove this access control, for now.
# vi /etc/openstack-dashboard/local_settings
#ALLOWED_HOSTS = ['192.168.100.154', 'kozik4.lan', 'localhost', ]
ALLOWED_HOSTS = ['*', ]
From here, reboot. When the computer comes back up, verify that basic network looks good. Here’s what ifconfig looks like:
# ifconfig
br-ex: flags=4163<UP,BROADCAST,RUNNING,MULTICAST>  mtu 1500
        inet 192.168.100.154  netmask 255.255.255.0  broadcast 192.168.100.255
        inet6 fe80::4216:7eff:feb1:64cd  prefixlen 64  scopeid 0x20
        ether 40:16:7e:b1:64:cd  txqueuelen 0  (Ethernet)

lo: flags=73<UP,LOOPBACK,RUNNING>  mtu 65536
        inet 127.0.0.1  netmask 255.0.0.0
        inet6 ::1  prefixlen 128  scopeid 0x10
        loop  txqueuelen 0  (Local Loopback)

p2p1: flags=4163<UP,BROADCAST,RUNNING,MULTICAST>  mtu 1500
        inet6 fe80::4216:7eff:feb1:64cd  prefixlen 64  scopeid 0x20
        ether 40:16:7e:b1:64:cd  txqueuelen 1000  (Ethernet)
# ovs-vsctl list-ports br-ex
p2p1
Above, verify that the host’s IP address is tied to br-ex and the interface p2p1 shows as a port on br-ex. These look good. Also verify that ssh [email protected] works; then go to another PC and run the same command. Finally, to make sure that the host can route to the internet, ping yahoo.com. These basic plumbing tests are needed for the rest of openstack to work, and in my case, it didn’t work the first time, and these basic sanity tests helped me troubleshoot.
A stuck point for me: when I reached this point one time before, I couldn’t ping yahoo.com. Which was disappointing because everything else worked. So I ran the following command:
# ip route show
default via 192.168.100.163 dev br-ex  # Verify this line is here!!
169.254.0.0/16 dev p2p1  scope link  metric 1002
169.254.0.0/16 dev br-ex  scope link  metric 1004
169.254.0.0/16 dev br-int  scope link  metric 1005
192.168.100.0/24 dev br-ex  proto kernel  scope link  src 192.168.100.154
Unlike what I list above, the default route didn’t get configured for my host’s network. I found some helpful notes that suggested manually adding it in (ip route add default via…). That worked, but what worked better for me was to disable NetworkManager (see steps I list earlier).
As an aside, the ip route show output above works for me, but doesn’t look right. The lines that begin with 169.254.0.0 shouldn’t be there (I think). Something is not quite right, but I don’t know if it is worth fixing. Anyway…
What I get now, is every time I boot, I get a clean network setup, incoming and outgoing.
Ok, once the PC’s network setup is stable after boot, run the openstack-status script; the script returns a long list of status lines and two key lines indicate a failed status.
# openstack-status
...
neutron-server:                         failed
rabbitmq-server:                        failed
...
For whatever reason (probably some fault in my setup steps), rabbitmq and neutron servers failed to start. I saw this issue addressed in the video referenced below; these services are easily restarted as shown below
systemctl start rabbitmq-server.service
systemctl start neutron-server.service
… everything comes back and the next steps work fine.
Openstack Dashboard
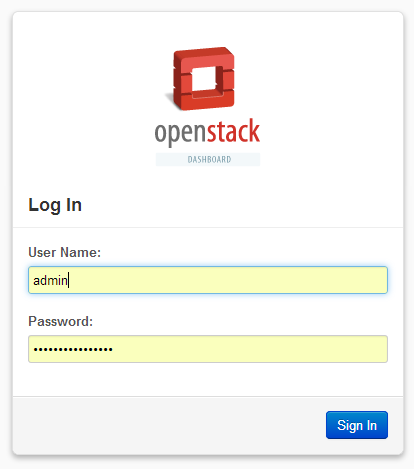
As a last step, go to a web browser and verify that you can login to the openstack dashboard. Once this step works, you should be able to do everything from a web browser or Putty terminal.
The dashboard is found at http://192.168.100.154/dashboard. The User Name is admin, the password for the dashboard is found in the keystone_admin file. Once you can login, then installing OpenStack Icehouse on Fedora 20 is complete.
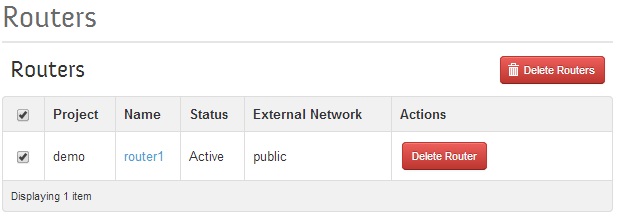
Once we are logged in, we need to navigate to the Admin->Routers page and delete the default router that packstack setup for us, select all the routers (only one) and then click on the “Delete Routers” button below:
Then we need to go to the Admin->Networks page and delete the networks. Select all the Networks, then click on the “Delete Networks” button below:

With the demo network and router setup re-initialized, we have a clean slate that we can build upon.
End of part 1. I next need to writeup the steps to configure a OpenStack, including how to load images, create instances, network those instances together, and bridge them to the home network. In addition, I will writeup how to map a “floating IP address” between an instance and my home network. All for next time.