
I have a home network server (with one NIC) that I dedicate to OpenStack testing. It is time for me to migrate to OpenStack Kilo on CENTOS7. As with my previous OpenStack setup, I am using the RDO community’s packstack tool. This note logs my experience, for my notes, and the potential benefit of others.
I generally followed the RDO Quickstart instructions, so chapeau to the community for laying out the steps for me.
CENTOS7 with Static IP.
 I picked CENTOS7 and did a bare-metal install usinga DVD I burned from the iso image named
 CentOS-7-x86_64-LiveKDE-1503. I installed new disk partitions, reformatting my drives.
As I learned from previous packstack installs, the networking needs to be configured with a static IP address. This can be done at CENTOS7 install time. Look for the “Networking & Hosts” button. Click it. On the next screen, there will be an icon at the bottom right; click it and edit the interface: change it from DHCP to manual.
The following screen cap from CENTOS7 install gives an idea of what I did.
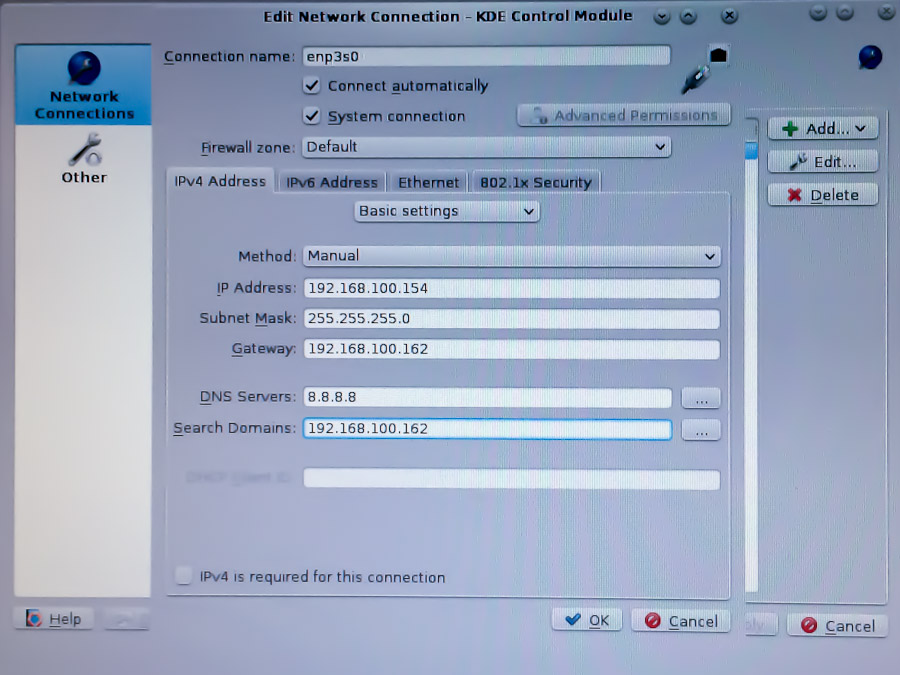
My passed Fedora/Centos install experience is to let the default DHCP networking get installed, then manually change things to static IP address. Not this time; here, I found setting the static IP at install time was easier for me.
Setup network, ssh, hosts and selinux
/etc/hosts and hostname
The packstack scripts need the hosts file and the hostname setup correctly.
# hostnamectl set-hostname kozik4.lan
# vi /etc/hostname
kozik4.lan
# vi /etc/hosts
127.0.0.1 kozik4.lan kozik4 localhost.localdomain localhost
129.168.100.154 kozik4.lan kozik4
SELinux
I turn SELinux to permissive mode ; edit a line in SElinux config file:
# setenforce permissive
# vi /etc/selinux/config
...
SELINUX=permissive
...
sshd for root login
OpenStack’s install script requires root access for ssh login. To setup ssh:
# vi /etc/ssh/sshd_config
...
PermitRootLogin yes
...
# systemctl  enable sshd.service
# systemctl  start sshd.service
When done with the install, I will turned off root login access.
Network Manager
Following the RDO Quickstart guide, turn off NetworkManager and turn on network
# systemctl stop NetworkManager.service
# systemctl disable NetworkManager.service
# systemctl enable network.service
# systemctl start network.service
Then reboot. Make sure basic networking is running. Verify ssh for root login works. Use another PC on the same LAN and verify ssh into the server works.
Install OpenStack Kilo on CENTOS7
In the root login, run the following steps. Make sure each one runs successfully before starting the next.
# yum update -y
# yum install -y https://rdoproject.org/repos/rdo-release.rpm
# yum install -y openstack-packstack
At this point, I insert a work around that is specific to my setup. This particular CENTOS7 distribution pulls in mariaDB as part of KDE. I found that this created a conflict with the packstack scripts. As I documented in a previous post, uninstall mariaDB as follows.
# yum remove mariadb-server
Run packstack
Now run the main install script, packstack. Note, I am adding orchestration in addition to the default install.
# packstack --allinone --os-heat-install=y
Note that this last step is the big installation step. It runs for a long time, and if it fails, it will give detailed error messages and pointers to log files. If you run into troubles, apply workarounds and to re-try, run packstack with an answer file, as follows:
# packstack --answer-file=packstack-answers-20150704-200908.txt
Assuming the packstack install works, verify the basic dashboard works by bringing-up the login screen. For my home server, http://192.168.100.154/dashboard:

Setup Bridging
In order for the OpenStack VM to network with my home lan, I needed to get bridging setup. First, I made the br-ex bridge points to the IP address/gateway that I originally setup for the NIC (in CENTOS7, the NIC is assigned a name enp3s0).
I edited ifcfg-br-ex as follows:
# vi /etc/sysconfig/network-scripts/ifcfg-br-ex
DEVICE=br-ex
DEVICETYPE=ovs
TYPE=OVSBridge
BOOTPROTO=static
IPADDR=192.168.100.154
NETMASK=255.255.255.0
ONBOOT=yes
GATEWAY=192.168.100.162
DNS1=8.8.8.8
DNS2=8.8.4.4
By default, the NIC (enp3s0) has the external IP address and gateway. Since we moved that to the external bridge, we need to make the NIC card look like a member of the bridge. I edited the ifcfg-enp3s0 as follows:
# vi /etc/sysconfig/network-scripts/ifcfg-enp3s0
DEVICE="enp3s0"
ONBOOT=yes
HWADDR=40:16:7E:B1:64:CD
TYPE=OVSPort
DEVICETYPE="ovs"
OVS_BRIDGE="br-ex"
At this point, I rebooted. When done, check everything. Verify ping to the Internet, verify the same, inbound. Verify ssh, both inbound and outbound.
For reference, I record my network setup here:
[root@kozik4 ~]# ifconfig
br-ex: flags=4163<UP,BROADCAST,RUNNING,MULTICAST>  mtu 1500
        inet 192.168.100.154  netmask 255.255.255.0  broadcast 192.168.100.255
        inet6 fe80::4216:7eff:feb1:64cd  prefixlen 64  scopeid 0x20
        ether 40:16:7e:b1:64:cd  txqueuelen 0  (Ethernet)
        RX packets 142320  bytes 27075628 (25.8 MiB)
        RX errors 0  dropped 15257  overruns 0  frame 0
        TX packets 3632  bytes 1435026 (1.3 MiB)
        TX errors 0  dropped 0 overruns 0  carrier 0  collisions 0

enp3s0: flags=4163<UP,BROADCAST,RUNNING,MULTICAST>  mtu 1500
        inet6 fe80::4216:7eff:feb1:64cd  prefixlen 64  scopeid 0x20
        ether 40:16:7e:b1:64:cd  txqueuelen 1000  (Ethernet)
        RX packets 149724  bytes 27519634 (26.2 MiB)
        RX errors 0  dropped 0  overruns 0  frame 0
        TX packets 4016  bytes 1460686 (1.3 MiB)
        TX errors 0  dropped 0 overruns 0  carrier 0  collisions 0

lo: flags=73<UP,LOOPBACK,RUNNING>  mtu 65536
        inet 127.0.0.1  netmask 255.0.0.0
        inet6 ::1  prefixlen 128  scopeid 0x10
        loop  txqueuelen 0  (Local Loopback)
        RX packets 2627327  bytes 289453679 (276.0 MiB)
        RX errors 0  dropped 0  overruns 0  frame 0
        TX packets 2627327  bytes 289453679 (276.0 MiB)
        TX errors 0  dropped 0 overruns 0  carrier 0  collisions 0

# ip route show
default via 192.168.100.162 dev br-ex
169.254.0.0/16 dev enp3s0  scope link  metric 1002
169.254.0.0/16 dev br-ex  scope link  metric 1004
192.168.100.0/24 dev br-ex  proto kernel  scope link  src 192.168.100.154
OpenStack Dashboard
 The dashboard is found at
 http://192.168.100.154/dashboard. The User Name is admin, the password for the dashboard is found in the /root/keystone_admin file. By default, I was able to access the dashboard from any PC on my home lan. For access from outside of my home LAN, I setup a NAT mapping in my home gateway, but I had to setup an alias in the OpenStack horizon apache configuration.
# vi /etc/httpd/conf.d/15-horizon_vhost.conf
...
ServerName kozik4.lan
ServerAlias os.mydomain.net # Add this line
...

# systemctl restart httpd.service
The name os.mydomain.net is a sub-domain name that I own, where I map it to the Internet routable IP address my ISP gives me. Verifiy that http://os.mydomain.net/dashboard works.
Once logged in, the dashboard shows the network setup that packstack installs for us by default. It sets up a private and public networks IP addresses that don’t match my needs. So I need to clear this out. The way OpenStack works, you cannot delete everything in one hammer-style step; you need to disassemble the networking one step at a time.
First, you need to delete the router, then delete the networks.
Remove the packstack default router and networks
Delete the pre-installed router
This step deletes the default router that packstack setup for us. The dashboard gives a nice GUI to do this. Navigate to Admin->Routers.
Admin->Routers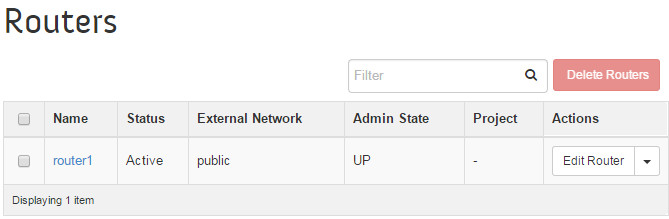
Before we can delete router1, we need to delete its interfaces. Click on “router1″
Admin->Routers->router1
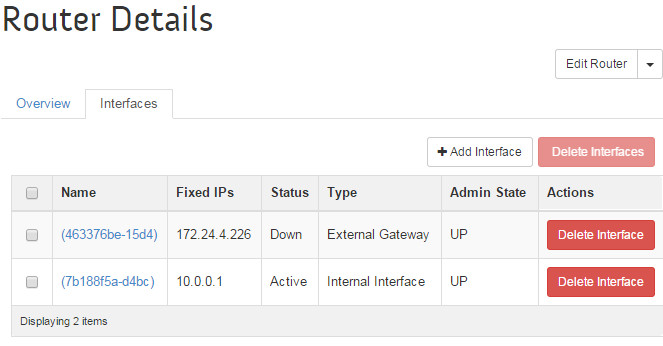 Using he GUI, we can delete these two interfaces, and then we can delete the router.
But for my own education and the potential automation of future installs, I figured out how to do this with OpenStack command line scripts. The easiest way to display this is to screen scrape my putty commands and insert it inline below:
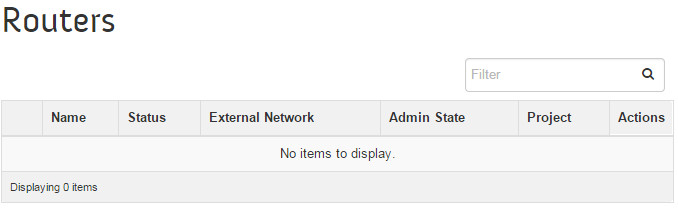
Go back to the dashboard Admin->Routers page, verify that the router has been cleared. I know, the command line steps are alot more difficult than clicking the “Delete Router” button, but this is how I learn.
Admin->Routers
Delete Pre-Installed Networks
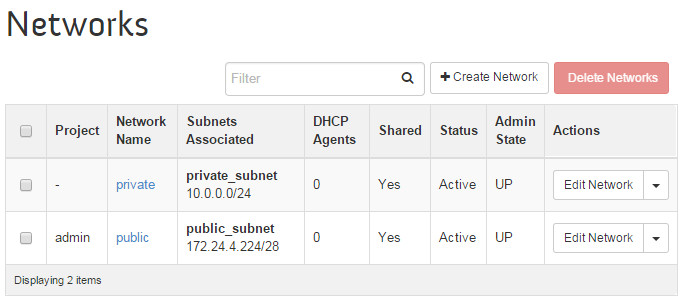
From the dashboard Admin->Networks. We want to delete the two networks packstack setup for us. In packstack (OpenStack?) terminology, the private network is the range of IP addresses used by the virtual machines used by the admin project within this OpenStack installation. The public network maps to the interface that routes packets to outside networks… in this case, the public network will eventually be assigned addresses that fit within my home lan (not Internet addressable IP address).
The Networks dashboard shows two networks. I want to remove them. It turns out you need to click on each of the networks and delete the subnets attached to the network. On the dash board it is pretty easy to do.
Admin->Networks
Here’s the command lines that will delete these two networks. Note, again, I typed the commands into my putty screen, and scraped them and inserted them inline below.
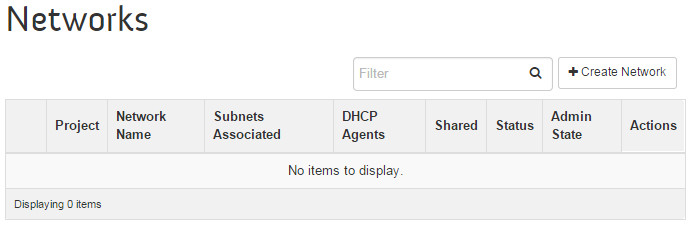
Verify that the Networks are gone in the dashboard.
Admin->Networks
Ok, to this point we have a clean slate ready to bring in images, spin up instances, and network them together.