All posts by Jack Kozik

nodejslogo-light

REST web service using Node, was originally written in PHP

Background on my REST web service using Node.js: One of my REST web service applications, originally written in PHP several years ago, needed to be cleaned up. I wanted to re-factored it to make it easier for me to maintain.   I had picked a PHP framework, and I was going to re-code.

For my own education, I decided to use this project as a trigger to learn Node.js.

I had been following the progress of the node community and some of the organizations at work had started using node, so I decided to give it a try. I had been using JavaScript for quite awhile doing front end programming in my browser applications and felt that it shouldn’t be too hard for me to learn.

The notes that follow capture some of my learnings and record some of the steps I followed to design and setup my new web service.

Install Node.js on my Fedora Server

I am a system admin of my own Fedora server, and I was looking to do a full install of nodejs. If you have a new Fedora sever (Fedora 18+), you just use “yum install nodejs” — but I have an older Fedora server so I had to dig around;  I found several useful Howto’s. What worked best for me was the following steps:

From root login:


$ cd /usr/local
$ wget http://nodejs.org/dist/v0.10.25/node-v0.10.25.tar.gz
$ tar zxvf node-v0.10.25.tar.gz
$ cd node-v0.10.25
$ ./configure
$ make
$ make install

Source: Ask Fedora Project

I then put node into default login profile:

$ cd /etc/profile.d
$ vi node.sh
#insert following lines
export PATH=/usr/local/bin:$PATH
export NODE_PATH=/usr/local/lib/node_modules
ZZ

From the root home directory and from my user log in id, I verified that node worked:

$ node -v
v0.10.25

The in my user account, I wrote a hello world style test application:

$ cd $HOME
$ mkdir helloworld
$ cd helloworld
$ vi app.js
// Insert the following files
// I forget which howto website I borrowed this from
var http = require('http');
var server = http.createServer(function(req, res) {
  console.log("web page accessed");
  res.writeHead(200);
  res.end('Hello Http');
});
server.listen(8000);
ZZ
$ node app.js

Note: the app.js is listening on port 8000. To make this work on my server, I needed to go into iptables and open port 8000. I am not going to show how to do that here, but it is easy to do and easy to overlook. It is worth the trouble to get this little app working because you’ll need port 8000 working for the next step.

Once port 8000 is open and the app.js script running, do the following command in a different terminal  window.

From user login:

$ curl -i http://localhost:8000

Output:

HTTP/1.1 200 OK
Date: Thu, 13 Feb 2014 16:27:00 GMT
Connection: keep-alive
Transfer-Encoding: chunked

Hello Http 

This turned out to be harder than I thought. The nodejs website offers Linux Binaries; I tried them and they didn’t work. I assume I did something wrong. Instead, I did the install from source setup.  On my machine, it took about 10 minutes to compile and build. (The make step was longer than I thought).

Restify Module

The node.js community has a large library of packaged modules. I picked the Restify module to build my package upon.  Since I am new to node, I don’t really know what the best choice would be, I just wanted to leverage something that had some good howto articles.

To setup restify, I ran the following steps from my root login:

$ npm install restify -g

Then from my development login, I wrote a barebones test application:

$ cd $HOME
$ mkdir restify
$ cd restify
$ vi app.js
// insert the following lines
// borrowed from stack overflow article:
// http://stackoverflow.com/questions/17589178/why-should-i-use-restify
var restify = require('restify');
var server = restify.createServer();
function respond(req, res, next) {
    res.send('hello ' + req.params.name);
}
server.get('/hello/:name', respond);
server.listen(8000, function() {
    console.log('Listening on port 8000');
});
ZZ
$ node app.js

Like the previous hello world test, this one verifies that basic restify works. I ran “node app.js” in one terminal window and in the other, I ran the following:


$ curl -i http://localhost:8000/hello/jack

Output:

HTTP/1.1 200 OK
Content-Type: application/json
Content-Length: 12
Date: Thu, 13 Feb 2014 17:03:19 GMT
Connection: keep-alive

hello jack 

I make this all look so easy, but along the way I had several gotcha type problems. I originally didn’t have the environment variables setup right. And, my initial installation of restify, I forgot to use the -g option. And for my initial setup, I did a couple of things in my root login that should have been done in my user login, etc. It is worth it to get the basic hello world done before you start.

Reference:  Creating a basic node.js api with restify and save by Dom Udall

My REST Design

RESTbooksMy web application edits and reports on some resources stored on my server. I want to grant access to these resource through a REST-ish API. The two key resources are charts and jefiles — it turns out that these are actually text files stored on my server. There is one chart file per year, so in my REST URI  I use the notation: chart/YY. The jefile files are monthly, with 12 months per year, so I picked the notation jefile/YY/MM.  In my REST URIs, MM=00-12 and YY is any two digits representing a year (eg YY==12 implies 2012, YY==98 implies 1998).

So, my design is for the following “GET” operations return data from the server to my web application:

# returns contents of chart file for the year YY, 
# where YY is 13 for 2013
http://localhost:8000/chart/YY 

# returns contents of jefile for the year YY, Month MM
# - where YY is 13 for 2013
# - where MM is 01-12, for a month
http://localhost:8000/jefile/YY/MM  

# returns concatenation of all jefiles for the year YY
# - where YY is 13 for 2013 (used for year to date reports)
http://localhost:8000/jefile/YY

Also, for debugging purposes, I want both plain text and json formatted data returned. I picked the above syntax to represent plain text response. Here’s the syntax for json responses:

http://localhost:8000/chart.json/YY
http://localhost:8000/jefile.json/YY/MM
http://localhost:8000/jefile.json/YY

I have experimented with using MIME types or other header mechanisms to control plain text vs json. I like this method because it lets me debug in any a normal browser; no special REST browser plugins needed to be installed. This approach is also valuable to me because it maintains continuity with my existing, several year old, PHP design approach.

So with this design, here’s the basic restify application.

From the file app.js:

var restify = require('restify');

var server = restify.createServer();
server
  // Allow the use of POST
  .use(restify.fullResponse())
  // Maps req.body to req.params so there is no switching between them
  .use(restify.bodyParser());

server.get('/chart/:YY', getChart);
server.get('/chart.json/:YY', getChart);

server.get('/jefile/:YY', getJefileForYY);
server.get('/jefile.json/:YY', getJefileForYY);

server.get('/jefile/:YY/:MM', getJefile);
server.get('/jefile.json/:YY/:MM', getJefile);
server.put('/jefile/:YY/:MM', putJefile);

server.listen(8000, function() {
    console.log('Listening on port 8000');
});

The server.get() callback functions (eg getJefile() ) all follow a common pattern:

function getJeFile(req, res, next) {
    console.log(params.req.YY);
    console.log(req.route.name);
    ...; 
    res.send(...);
    next();
}

The restify framework’s server.get() function takes the incoming REST request, parses the URI and matches it to the first parameter of the server.get() function,  and runs the callback  function with the request neatly parsed into the object req. Since in REST APIs, the GET method nominally has an empty message body, the only real input are the parameters parsed out of the URL. In my code above :YY and :MM ids are the names of the URI parameters.

These parameters are parsed by restify and stored  in the object params.req. For all of my server functions, I always have params.req.YY as in input. Restify API document covers this, but again, this design pattern is found throughout nodejs code as a way for a chain of functions to all share the same input and output objects.

The callback functions above (eg getJeFile()) generates the content that gets stored into the response object, the 2nd callback parameter res. When the callback function is complete, it calls next(), the 3rd parameter.

So here’s what my 3 server.get() callback functions look like.

From app.js:


getChart = function getChart(req, res, next) {
    console.log(req.route.name);
    var year = req.params.YY;
    // validate year
    // get contents of chart file
    // if I find any errors:  return next( Error object )
    res.send(chartFile);
    return next();
}

getJefile = function getJefile(req, res, next) {
    console.log(req.route.name);
    var year = req.params.YY;
    var month = req.params.MM;
    // validate year, month
    // read contents of jefile file
    // if I find any errors:  return next( Error object )
    res.send(jefileFile);
    return next();
}

getJefileForYY = function getJefileForYY(req, res, next) {
    console.log(req.route.name);
    var year = req.params.YY;
    // validate year
    // get contents of all of the jefile files, concatenate
    // If I find any errors:  return next( Error object )
    res.send(jefileFileForYY);
    return next();
}

Note:  the above code is simplified to better help explain what I am doing.

For the case where my web application wants to write content to the server, I use the REST PUT method. The PUT method writes or overwrites the full contents of a resource. Since I am working with whole files on the web server, PUT is appropriate. POST would be OK, if I was adding blocks of data to an existing file; but I am not.

So to make a PUT work in the restify framework, my server.put() callback function needs to parse and validate the message body, convert it from JSON to a native format then save the contents to a file on the server. Restify makes this pretty easy. Here’s the basics:

From app.js:


putJefile = function putJefile(req, res, next) {
    console.log(req.params);
    console.log(req.route.name);
    var year = req.params.YY;
    var month = req.params.MM;
    // validate year
    // validate requerst body, named jefilejson, is valid
    jefileFile = JSON.pars(req.params.jefilejson)
    // write contents of jefileFile to server, directory YY, file-MM
    res.send(200)
    return next();
}

Note: the message body holds a json object; in my case, the web application names the json object jefilejson. So to access the contents of the message body, you access req.params.jefilejson.

Validating the MM and YY ids

The server.get() routing function’s syntax makes it easy to match roughly correctly formatted URIs, but for me, it didn’t have enough checking power to verify that the YY and MM ids were correct. Server.get() just matches any character between the slashes; it doesn’t check that YY is 2 numeric digits or that MM is 01-12 only with the leading zero required. I had to add my own validation logic in each of my callback functions.

It turns out the code for verifying YY and MM ids was several lines of coded repeated multiple times. Node.js and restify design patterns give you the option of inserting additional callback functions into the server.get() function call. I added validation functions as follows:

From app.js:


server.get('/chart/:YY', validateYY, getChart);
server.get('/chart.json/:YY', validateYY, getChart);

server.get('/jefile/:YY', validateYY, getJefileForYY);
server.get('/jefile.json/:YY', validateYY, getJefileForYY);

server.get('/jefile/:YY/:MM', validateYY, validateMM, getJefile);
server.get('/jefile.json/:YY/:MM', validateYY, validateMM, getJefile);
server.put('/jefile/:YY/:MM', validateYY, validateMM, putJefile);

Now, I liked this because it let me re-factor a bunch of common code out of each of my callback functions. I have seen other node.js code snippets that take advantage of this coding pattern.

Validation Functions and Error Handling.

Within a nodejs or restify program, there’s a common way of handling errors. Since everything is asynchronous and chained together with next() functions, there needs to be a way to break the chain on error conditions. The key technique is to call the next() function with an Error object as a parameter. Let me show how I coded the validateYY() function.

From app.js:


/*
** Validate YY id.
** -- syntax:  2 digits, 00-99
** -- directory nfroot+YY must exist
*/
function validateYY(req, res, next) {
    var ret = 500;
    var year = req.params.YY;
    console.log('validateYY:'+req.route.name);
    var isValidYY = year.match(/^\d\d$/);
    if (!isValidYY) {
        ret =  new Error("The field YY-'"+year+"' is not valid.  YY is a two digit year where YY is 00-99");
        ret.statusCode = 400;
        return next(ret);
    }
    /* Verify that YY exists */
    if (!fs.existsSync(nfroot+year)) {
        ret = new Error("The field YY-'"+year+"' is not valid. The diretory-'"+nfroot+year+"' doesn't exist on server.");
        ret.statusCode = 404;
        return next(ret);
    }
    /* Verify that YY is a directory */
    if (!fs.lstatSync(nfroot+year).isDirectory()) {
        ret = new Error("Server side problem:  The path -'"+nfroot+year+"' is a file, but must be a directory.");
        ret.statusCode = 500;
        return next(ret);
    }
    return next();
}

The key is the Error object. When I first saw code snippets using the Error object, I didn’t really know what’s going on. I Googled it and found there’s a rich design pattern built into node.js around how errors are handled. If you just jump into node.js like me, there’s lots of things you need to learn. Restify just leverages Error, assuming coders already know how to work node.js.

Notice in the code above, I tried really hard to follow best practices for mapping http error codes into my REST API definitions. For the case of  someone trying to access a resource like a particular jefile file within a year (eg ..jefile/YY/MM): If the syntax was wrong, I returned a Bad Format (400) error; if the format of the REST URI was right but the file requested file didn’t exist I returned a Not Found (404) error. Also, I even verified that YY in the path was really a directory on the server; if not, that’s shouldn’t ever happen — I returned a Server Error (500).

The way the function chaining works: if next() is passed an Error object, the chaining stops and a json formated response is generated with Error information. This powerful construct is built into node.js, but if you didn’t know it, you might start inventing it yourself, especially if you come from a PHP background, like me.

Splitting Node applications into multiple files – Module Loading with Require

When I first started my node project, I put everything into one big app.js file. This got too big and clumsy for me. I am used to working on projects where coding is split across multiple source files. The node documentation defines a method for split source code across multiple files…  similar to how multiple modules are handled in web browser applications.

I decided to dedicate a source file to each of my main REST resources. For this writeup, those would be chart.js and jefile.js. I still have a main app.js. The way to link them together is to use the require() functions at the top of each file:

Contents of app.js:


var restify = require('restify');
var chart = require('./chart');
var jefile = require('./jefile');
...
server.get('/chart/:YY', validateYY, chart.getChart);
server.get('/chart.json/:YY', validateYY, chart.getChart);
server.get('/jefile/:YY/:MM',validateYY,validateMM, jefile.getJefile);
server.get('/jefile.json/:YY/:MM',validateYY,validateMM,
             jefile.getJefile);
server.put('/jefile/:YY/:MM',validateYY,validateMM,jefile.putJefile);

Contents of jefile.js:


exports.putJefile = function putJefile(req, res, next) { ... }
exports.getJefile = function getJefile(req, res, next) { ... }

Contents of chart.js:


exports.getChart = function getChart(req, res, next) { ... }

Note a few things: the require() function for restify does not need a path. I installed the restify NPM globally (-g option).  The require() function is only needed in the main file, app.js. The restify routing functions (eg server.get()) references callback functions from the other source files, by prefixing with chart or jefile. And, the source code for those callbacks are written as exports (eg. exports.getJefile = …).

Note how I managed, syntactically, my REST GET API methods for returning plain or JSON responses.  ../chart/YY returns the contents of the chart file for year YY; ../chart.json/YY returns the same file, but in JSON format.  Visually, I would rather see the contents of the chart file in native format, but for web page development, I want all responses in JSON format.  The server.get() callback for both of these cases is getChart().  The way the getChart() function knows to return json or native format is by looking at the req.route.name parameter; that tells me how the getChart() was called.

The way source files are modularized is a pattern is written about in the nodejs documentation, but it turns out there are many more advanced ways of managing modules. This one worked great for me. It also made it easier for me to debug and test each resource without wrecking, accidentally, the others.

Reference: Node API Docs: Modules 

Run Node and Apache both on Port 80

As I get my REST web service using Node working, I need to integrate it into the web service infrastructure already installed on my server.  Port 80 today runs Apache serving  blogs, weather stations,  and a couple of web applications — all intertwined with Apache and I cannot just start over.

So I found a way to get Apache to work with node; I keep node on port 8000 and Apache on port 80 and configure an Apache “ProxyPass” for URLs to the node-based REST service.

In /etc/httpd/conf/httpd:

<VirtualHost 64.53.181.XXX 192.168.100.XXX >
    ServerName mydomain.com
    ...
    ProxyPass /node http://localhost:8000/
    ...
</VirtualHost >

Any URI with mydomain.com/node in it gets redirected to my node service. This is good, but part of the reason for moving to node is that it is supposed to give much improved performance — not that Apache is slow, but because it has years of historic features built into it that take longer to execute.

Well someday, I’ll run only node. But for now, for me, node must coexist and this method works for me.

Conclusions

Working with Javascript on the server side was nice.  For me, the debugging skills that I use for web page development carried over nicely to node development.  Nodejs’s asynchronous design pattern was new to me, but once I caught on, it wasn’t bad.  The way nodejs standardizes error handling is much better than the adhoc approaches that I have been using with PHP.

I found that I missed some of the PHP built in functions.  For example, to access files on the server, nodejs has a very robust File System module.  It behaves differently from PHP, but I was able to figure it out — they are all based on the same underlying C libraries.  I resisted the temptation to use one of the frameworks that help bridge PHP developers into nodejs; they aren’t bad, but they worked against my objective to learn.

Some next steps:  I would like to do some performance comparisons.  Superficially, my REST API re-written in node is faster than the existing PHP implementation.  I’d like to quantify.  Also, I have written server side code, that I ought to be able to use inside the web client applications; that would be a nice thing to clean up.  Also, I’d like to get my node application to do logging at least equal to the logging I get from Apache — restify has some nice built in features for that.

There’s a big library of NPM modules out there. I’d like to learn more about them. This time around, all I really needed was restify. Maybe next time, I’ll try to use more of the features inside of it, or branch out and learn express. Anyway, thanks to the greater nodejs community for helping me get started.

nodejs-1024x768

Cable Car Turntable

Nob Hill Walk Cable Car Loop — San Francisco

Background on my Nob Hill Walk:  I was in San Francisco on business.  My hotel and meetings were on Nob Hill.  On my first day of meetings, I did an early morning walk and a late evening Cable Car excursion, looping the city.  A beautiful day.

Nob Hill Walk – Down California, Cable Car Back

California StreetNewhall Building

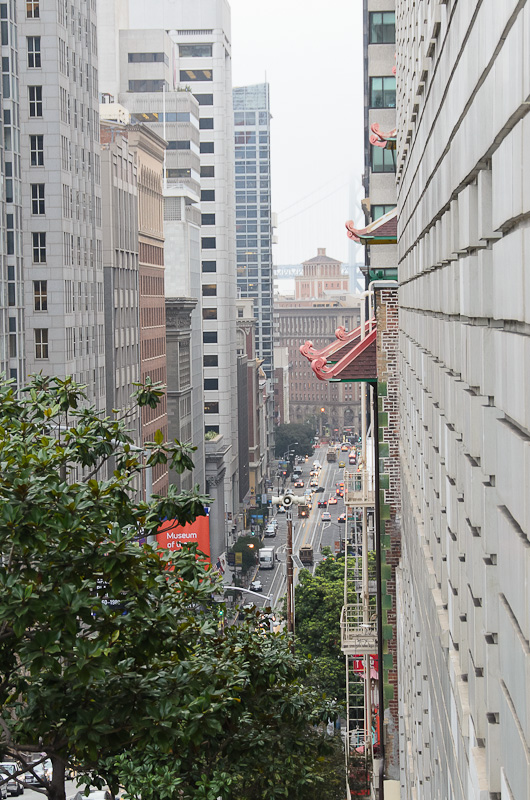
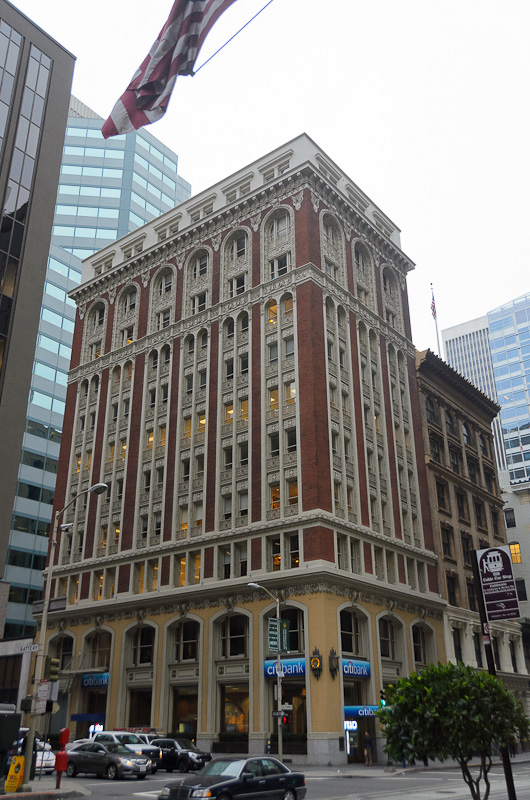
I was in San Francisco for business meetings. Early in the morning on the second day of my visit I decided to go for a walk from my hotel on Nob Hill heading East down California Street.  My walk ended at Market Street; from there, I caught the California Line Cable Car to take me back.

For this nice little walk, I walked past buildings mostly in the Financial District:  Transamerica Pyramid, 650 California Street / Hartford Building, Old St. Mary’s Church, Omni San Francisco Hotel, Alvinza Hayward Building, Union Bank / Bank of California, and the terraced gardens of the 101 California Building.

The cable car terminus at California and Market/Drumm Streets was all torn up.  At first, I thought I couldn’t board here because of the construction, but after awhile several people started queuing up so I knew this was still a good pick up point. The workers there were making sure that people were queuing for the cable car in a safe spot.

Heading back, I saw the Sing Fat Building, Mark Hopkins Hotel, Ritz-Carlton, Fairmont Hotel, and the Pacific-Union Club — Nob Hill is a nice place to visit!

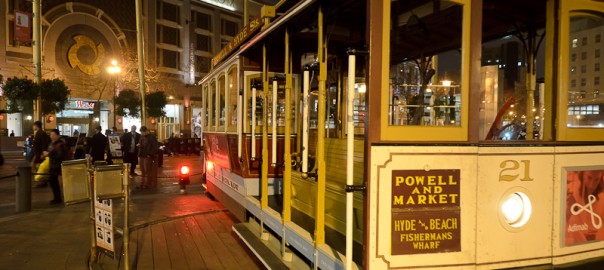
Cable Car Ride: Union Square on Powell/Mason line to Embarcadero Streetcar South to California Line back to Nob Hill

Bay Bridge

After a full day of meetings and dinner, I took a for-fun ride on the cable cars.

I started at Union Square, hopping on the Powell/Mason Cable car on Market Street heading North all the way up to Fisherman’s Wharf.  I briefly walked around and then caught the Embarcadero Streetcar and road South along the F-Market & Wharves line to the Ferry Building at Market Street.

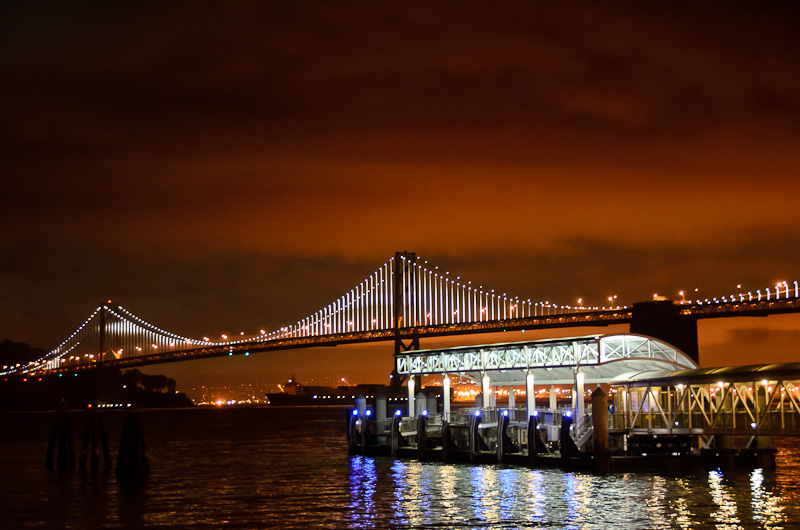
I walked around the area, took some pictures of the Bay Bridge, had dinner nearby then walked over to the California line cable car terminus.  I rode up Nob Hill, back to my hotel.

This is a fun loop; this is something I have always wanted to do.  The only really new segment for me was the Streetcar.  I rode in one of the decades old vintage street cars.  It was perfectly restored and had a very comfortable ride.  I shared it with about 15 other people.  I have seen the street cars before; they look really cool, but they aren’t the same as the cable car… much more like a bus.

On the loop, I took pictures of some noteworthy sites:  “Hearts in San Francisco” and Dewey Monument in Union Square Park, Westin St Francis, Sam’s Cable Car Lounge, Blue Mermaid bar in Fisherman’s Wharf, Ferry Building Clock Tower, San Francisco–Oakland Bay Bridge, Gandhi Statue in the Golden Gate Ferry Terminal, Southern Pacific Building, Vaillancourt Fountain, and the The Pacific-Union Club, Grace Cathedral and the Mark Hopkins hotel on Nob Hill.

I bought a one day pass for the cable cars.  It came in handy for this trip, which otherwise would have cost 3 separate fares.  I did this at night, a little bit late.  This was mostly ok, because during the day it is alot more crowded.
Cable Car Loop: Union Square taking Powell/Mason line to Embarcadero Streetcar to California Line to Nob Hill at EveryTrail

EveryTrail – Find the best Walking Tours in San Francisco, California

jqueryWriteLessDoMore120213

$.ajax logging using Ajax Global Events. Re-factoring Single Page Web Application

Background on $.ajax logging using Ajax Global Events:  So I’ve moved from jQuery 1.4 to 1.9. I have some time to refactor my code to take advantage of some of the new features of 1.9 and to get ready for 1.10; the next jQuery release removes some of the deprecated methods.

For this round of coding, I am focusing on the $.ajax() method. In my present design, my single page web application makes REST calls for many of the UI menu items. For example, a click on the FILE->LOAD menu item triggers a function call to code that retrieves a file from my server. The basic pattern is like this:

// Start spinner
// start logging timer
$.ajax({"url":RestURI,
 "type":"GET",
 "dataType":"json",
 success: function(data) {
 // Do success stuff (parse, format and display)
 // stop logging timer, do logging
 // stop spinnger
 }, /* end success: */

 error: function (req, stat, err) {
 // Do error stuff
 // stop logging timer, do logging
 // stop spinner
 } /* end error: */
});

I have more than 7 code blocks that follow this pattern. Since the success/error/complete callback functions have been deprecated and I need to touch the code anyways, I thought I’d use the newish $.ajax() global events handlers  to clean up my code. The event handlers seem to be a useful place to put common pieces of code that really shouldn’t have been so liberally cut-and-pasted when I wrote the original code.

jQueryIcon120213For each of my ajax code blocks, I put a generous amount of logging in. Maybe this logging should only be needed when writing/debugging the code, but for me, since I spend so little dedicated time on this application, I wanted to keep verbose logging on always to make it real easy for me to debug.

$.ajax logging using Ajax Global Events

The following new block of code is doing my $.ajax logging using Ajax Global Events.

$(document).ajaxSend(function(evt, xhr, settings) {
 console.log(settings.type+" "+settings.url+" Sent");
 start = new Date().getTime();
 // Other logging
});
$(document).ajaxSuccess(function(evt, xhr, settings) {
 console.log(settings.type+" "+settings.url+" Success");
 // Other logging
});
$(document).ajaxError(function(evt, xhr, settings, exc) {
 console.log( settings.type+" "+settings.url+" Failed. "
 +xhr.status+"-"+xhr.statusText);
 // Other logging
});
$(document).ajaxComplete(function(evt, xhr, settings) {
 console.log(settings.type+" "+settings.url+" Complete");
 end = new Date().getTime();
 diff = end - start;
 // Other logging
});

As you can see, the ajaxSend/ajaxSuccess/ajaxError/ajaxComplete events are fired in sequence at the $.ajax() function executes and after the  .done(), .fail() and .compete() callbacks are executed.

The “Other logging” comment represents 2 or 3 lines of code where I put logging information into a user visible menu item (REPORTS->LOG) where I can see even more details without having to open the console window. For me, this effort is a nice clean out some of the logging stuff, to make the application logic a little more visible;  this clears up a bunch of clutter for me.

New-ish .done/.fail/.always Callbacks

Therefore, my $.ajax() code blocks are straighten out to follow the new done/fail/always callbacks. Here’s an example new $.ajax() code block:

// Start spinner
$.ajax({url:RestURI,
 type:"GET",
 dataType:"json"})
 .done( function(data, textStatus, jqXHR) {
 // Do success stuff
 }) /* end done: */

 .fail( function (jqXHR, textStatus, err) {
 // Do error stuff
 }) /* end fail */

 .always( function() {
 // stop spinner
 }); /* End always */

Some things to note: I still put the start/stop spinner function calls inline. I may move this to the global even handlers, but not yet.

Deferred Objects

Also, the done/fail/always call backs follow the new Deferred Object model. This will then let me setup some promise objects to let me address some of the async race conditions I have in my application.

For example, I have a case where I can run FILE->SAVE and then run REPORT->General and the report will produce results before the save was completed. I know how to fix this, but I was looking to use my new ajax code blocks architecture to get some practice with promise objects instead… for next time.

Code Snippets Causing Slow Website Load Time

Background on my Slow Website Load Time issue: I wrote a blog entry that described how I upgraded one of my web pages to use normalize.css (part of my migration to HTML5 Boilerplate 4.2). Normalize.css let me clean up my CSS nicely and helped teach me some discipline on CSS design. All good, but…

The blog posting took a crazy long time to load. I am used to WordPress blog pages being a little heavy and but this was too slow.

I had recently learned about the WebPageTest.org tool, and decided to use it to troubleshoot my issue. Other bloggers point to this website for workingSlow Website Load Time issuess. Here’s what the tool’s waterfall summary page  showed me:

Webpagetest17secBefore110713


The chart had lots of red lines: these are lines that reflect 404 error timeouts. I was surprised; the posting didn’t have any links to external content (that I knew of!). I clicked on the waterfall thumbnail and saw the following:
Webpagetest404err110713


The 404s are from style.css, normalize.css, main.css, and jquery-ui — huh? These are links in my code snippet!

My blog postings showed the before/after of my <head> section of my normalized web page. Here’s the after snippet:

HeadSection110713


So do web browsers resolve and fetch URLs embedded in <pre> sections? Really? (sorry to be ignorant about this, but I really didn’t think so). Yes a quick search of stackoverflow and I find that this questions has been asked and answered. When you have a <pre> block, you need to escape the < and > characters (&lt; and &gt;). Stackoverflow reference

So, I manually edited my code snippets to escape the angle brackets, and everything loaded much more quickly. The browser no longer tried to resolve the URLs.

Here’s the new WebPageTest.org thumbnail (no red lines!)
Webpagetest10secAfter110713

Oh, and while I was learning the WebPageTest.org tool, I found a bunch of other problems, which were much more obvious and easy to fix.