In my previous post, I outlined the steps followed to install OpenStack Kilo on CENTOS7. In this post I show the steps to setup networking, routing, and spinning up a couple of test instances.
Create Networks
In this section, I list the steps to create two OpenStack networks:
- Homelan. This network connects the OpenStack VMs to an external network, which in my case is my home LAN.
- Tenant. This network connects the OpenStack VMs internally.
From the root login, run the following neutron commands:
Create network homelan-net, subnet homelan-subnet
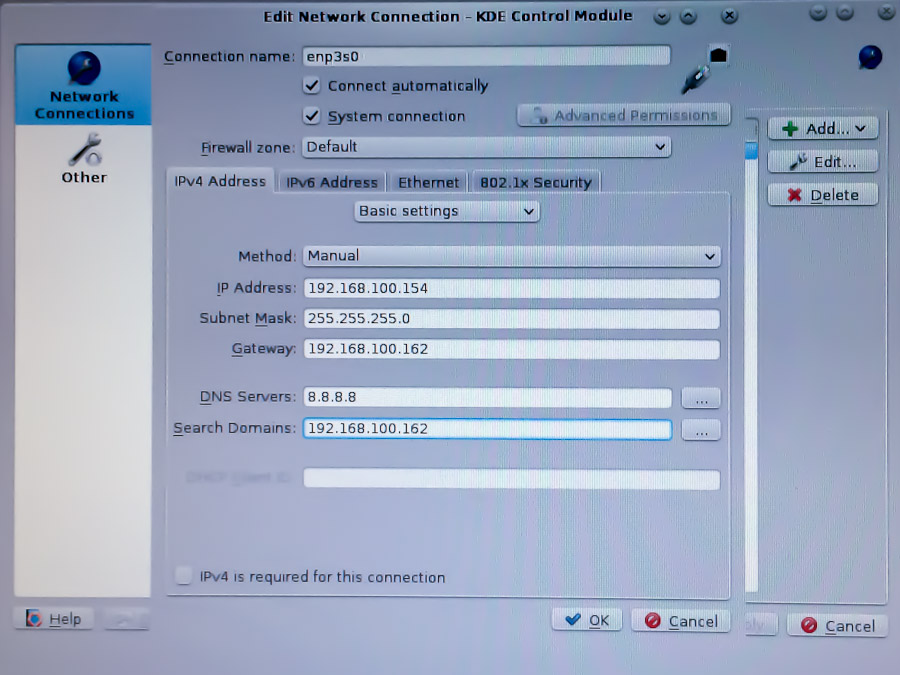
My OpenStack Kilo server sits in my home network, 192.168.100.0/26. The server is .154 and gateway .162. The homelan-net network gateways to my home LAN and through my cable modem, to the internet. The virtual machines that sit inside the OpenStack cloud on a different network and will map their IP addresses to one of the IP addresses in the allocation pool .70 thru .99. This mapping is assigned one at a time as the VMs are created.
# source keystonerc_admin
# neutron net-create homelan-net --router:external
# neutron subnet-create homelan-net 192.168.100.0/24 \
   --name homelan-subnet \
   --allocation-pool start=192.168.100.70,end=192.168.100.99 \
   --disable-dhcp --gateway 192.168.100.162
Create network tenant-net, subnet tenant-subnet
The neutron commands below create a tentant-net that has a DHCP-based address pool in the 10.0.0.0/24 address block. Virtual machines will be created with an address from this DHCP address pool.
# neutron net-create tenant-net
# neutron subnet-create tenant-net 10.0.0.0/24 \
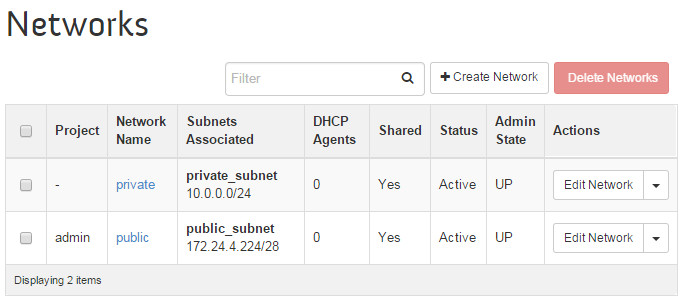
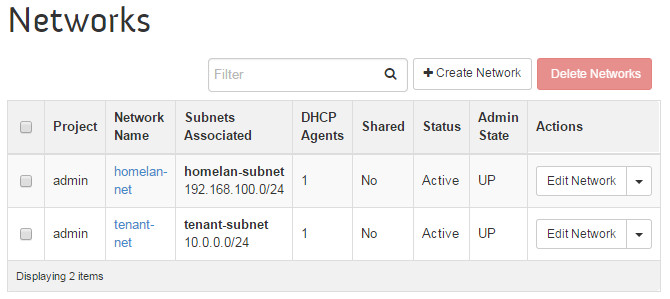
--name tenant-subnet --gateway 10.0.0.1 --dns-nameservers list=true\ 8.8.4.4 8.8.8.8Verify the setup by going to the OpenStack dashboard. It displays the networks:
Admin->Networks
Create Router
After creating the networks, connect them together through a router, using the following neutron commands:
# neutron router-create router1
# neutron router-interface-add router1 tenant-subnet
# neutron router-gateway-set router1 homelan-net
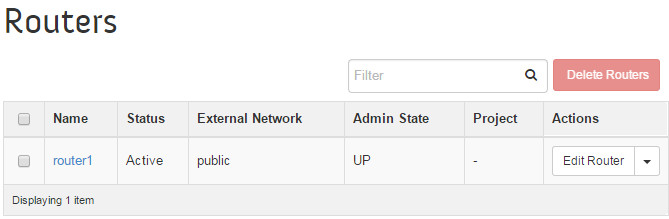
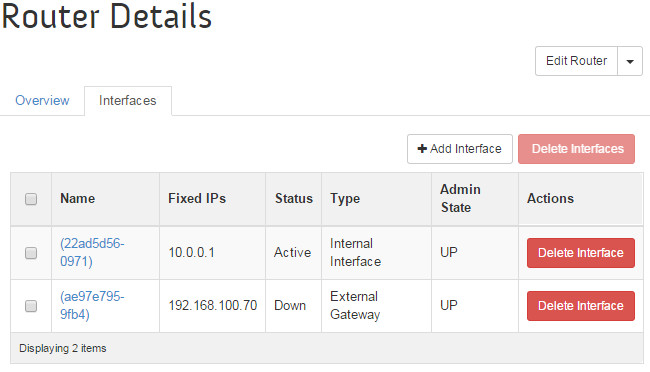
The router setup can be verified at the OpenStack dashboard:
Admin->Routers
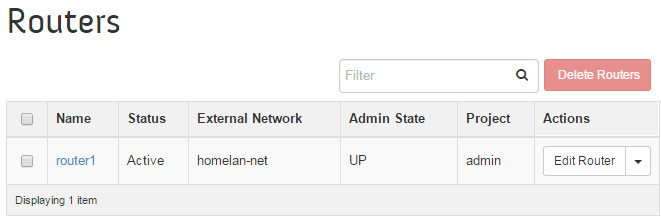
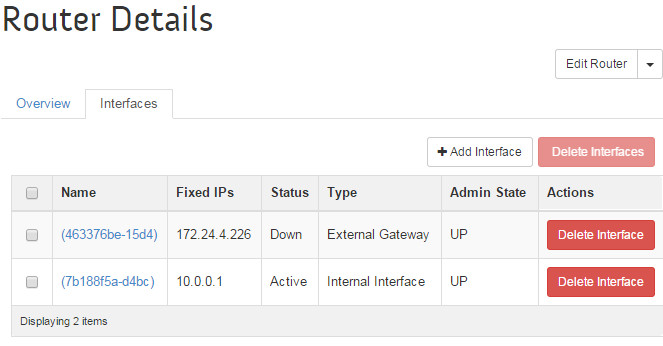
Admin->Routers->router1
The OpenStack Dashboard displays the same thing, but graphically.
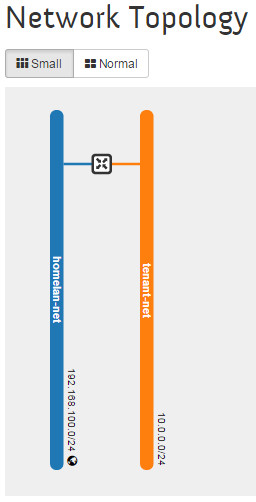
The tenant-net is where the instances will connect. Let’s bring up two.
Spin-up Cirros Instance
WIth the networks and router setup, we have the base for spinning up the default image supplied with the packstack installation.
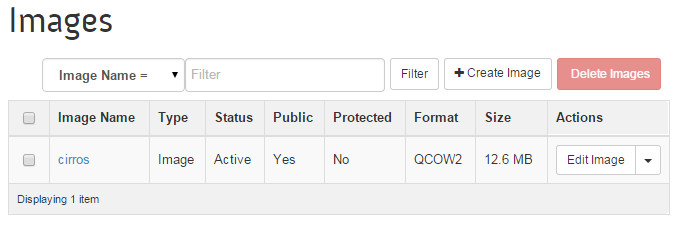
Cirros is a barebones linux distribution well-suited for verifying OpenStack installations.
You can see the cirros image in the OpenStack dashboard:
To spin-up cirros, first setup a key-pair and some access control rules:
# nova keypair-add 080315-key > 080315-key.key
# chmod 600 080315-key.key
# nova keypair-list
+------------+-------------------------------------------------+
| Name       | Fingerprint                                     |
+------------+-------------------------------------------------+
| 080315-key | c9:02:a4:18:f5:32:f4:3c:64:5a:0e:e1:5e:be:f8:39 |
+------------+-------------------------------------------------+
# nova secgroup-add-rule default icmp -1 -1 0.0.0.0/0
# nova secgroup-add-rule default tcp 22 22 0.0.0.0/0
# nova secgroup-add-rule default tcp 80 80  0.0.0.0/0
Now use the nova command to boot-up a cirros instance. The nova command needs to know the id of the tenant-net. I can get this with the neutron net-list command.
# neutron net-list
+--------------------------------------+-------------+-------------------------------------------------------+
| id                                   | name        | subnets                                               |
+--------------------------------------+-------------+-------------------------------------------------------+
| f8f04abf-dcba-46b7-9094-910e58530f0f | tenant-net  | 4a626740-7a14-443a-873d-d490132bbe10 10.0.0.0/24      |
| dbc40c3e-0175-4774-8b63-20896990c806 | homelan-net | 81f1eb33-0265-4d23-b668-d69b7a29c4b1 192.168.100.0/24 |
+--------------------------------------+-------------+-------------------------------------------------------+

# nova boot --flavor m1.tiny --image cirros
       --nic net-id=f8f04abf-dcba-46b7-9094-910e58530f0f
       --security-group default --key-name 080315-key cirros081315
#
The new image, named cirros081315, interfaces to the tenant-net network; it is allocated a DHCP-based address from the 10.0.0.0/24 pool. The virtual machine needs to have it’s IP address mapped through the router to a floating IP address on the homelan interface of the router.
The following commands allocates a floating IP address, then the IP address gets associated with the cirros instance.
# neutron floatingip-create homelan-net
Created a new floatingip:
+---------------------+--------------------------------------+
| Field               | Value                                |
+---------------------+--------------------------------------+
| fixed_ip_address    |                                      |
| floating_ip_address | 192.168.100.71                       |
| floating_network_id | dbc40c3e-0175-4774-8b63-20896990c806 |
| id                  | f104ccad-7227-4bc8-8bc5-e74a9656cfd5 |
| port_id             |                                      |
| router_id           |                                      |
| status              | DOWN                                 |
| tenant_id           | 0487893a0cdb4ac18c8837f9e7e177ab     |
+---------------------+--------------------------------------+
# nova floating-ip-associate cirros081315 192.168.100.71
The new instance can be found in the OpenStack dashboard:

Login to the instance using the following:
ssh -i 080315-key.key [email protected]
Verify that pings to the internet work, verify ssh to other servers on the homelan. If you get this far, things are in pretty good shape.
Spin-up a Fedora instance
With cirros working, I want to verify that I can import my usual image and spin it up. And, I haven’t used Fedora 22 yet and this will give me a chance to see what’s changed.
The following commands imports a Fedora image, spins it up into instance, then using a floating IP address, maps the instance to my home LAN.
# glance image-list
+--------------------------------------+------------------------+
| ID                                   | Name                   |
+--------------------------------------+------------------------+
| 571a3d1f-afce-4e8b-b180-acf11903ada2 | cirros                 |
| e6c70bd3-dd5c-4687-ba5f-2bf6c6196b22 | Fedora 22 Cloud x86_64 |
+--------------------------------------+------------------------+

# nova boot --flavor m1.small --image "Fedora 22 Cloud x86_64" \
  --nic net-id=f8f04abf-dcba-46b7-9094-910e58530f0f \
  --security-group default \
  --key-name 080315-key fedora22080315
# neutron floatingip-create homelan-net
Created a new floatingip:
+---------------------+--------------------------------------+
| Field               | Value                                |
+---------------------+--------------------------------------+
| fixed_ip_address    |                                      |
| floating_ip_address | 192.168.100.72                       |
| floating_network_id | dbc40c3e-0175-4774-8b63-20896990c806 |
| id                  | d23783fe-18bc-44b8-9ba6-299c7917046c |
| port_id             |                                      |
| router_id           |                                      |
| status              | DOWN                                 |
| tenant_id           | 0487893a0cdb4ac18c8837f9e7e177ab     |
+---------------------+--------------------------------------+
# nova floating-ip-associate fedora22080315  192.168.100.72
Note that this new Fedora instance uses the same key-name and net-id as the cirros instance. Login to the instance and verify connectivity:
# ssh -i 080315-key.key [email protected]
The authenticity of host '192.168.100.72 (192.168.100.72)' can't be established.
ECDSA key fingerprint is 1a:60:ef:e1:9b:f1:78:72:61:47:01:54:ab:21:6e:5d.
Are you sure you want to continue connecting (yes/no)? yes
Warning: Permanently added '192.168.100.72' (ECDSA) to the list of known hosts.
$ ping yahoo.com
PING yahoo.com (206.190.36.45) 56(84) bytes of data.
64 bytes from ir1.fp.vip.gq1.yahoo.com (206.190.36.45): icmp_seq=1 ttl=47 time=107 ms
64 bytes from ir1.fp.vip.gq1.yahoo.com (206.190.36.45): icmp_seq=2 ttl=47 time=135 ms
64 bytes from ir1.fp.vip.gq1.yahoo.com (206.190.36.45): icmp_seq=3 ttl=47 time=120 ms
^C
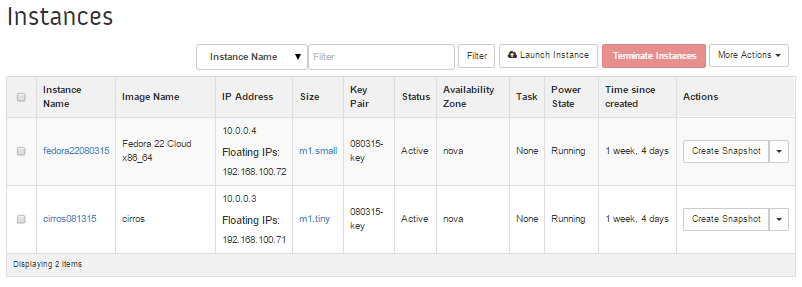
The OpenStack dashboard screen caps below show the Fedora and Cirros instances:
Project->Instances
Projects->Network->Network Topology
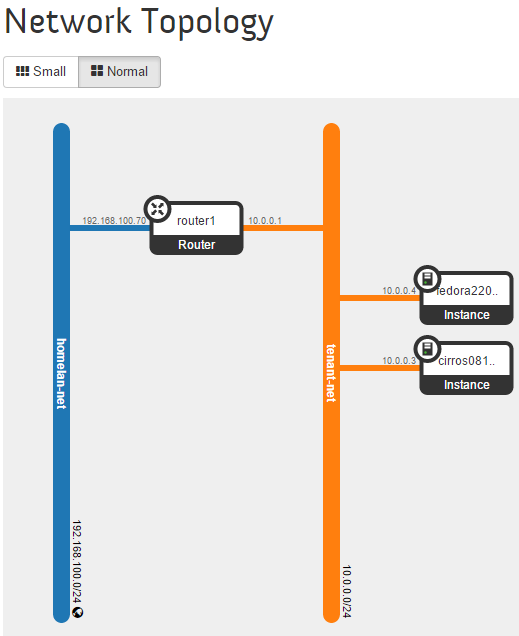
Web Server on Fedora 22
Just to confirm end-to-end networking, the following steps setup a web server on the Fedora 22 instance. Continuing from the Fedora ssh session above, run the following:
$ sudo su -
# yum groupinstall "Web Server"
# systemctl enable httpd.service
Created symlink from /etc/systemd/system/multi-user.target.wants/httpd.service to /usr/lib/systemd/system/httpd.service.
# systemctl start  httpd.service
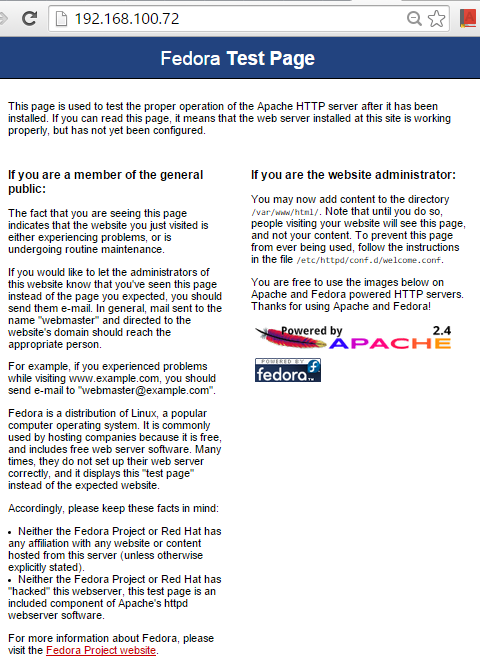
The IP address for the Fedora instance is .72. Go to another PC on the homelan and verify that the newly installed web server works. The default apache test page looks like the following:
Comments
In my write-up here, I setup the networks, router, image, and instances using OpenStack command lines. In past installations, I used the OpenStack dashboard. This time around I took the extra effort to learn the command lines. I would say that the web interface was easier and probably what I will use going forward.
For my records, and the potential benefit of others, here’s the entire sequence of commands all in one big gist: